Basement: Difference between revisions
geometrydash.wiki.gg>Hackey5 m Updating file links (automatic) |
geometrydash.wiki.gg>Hackey5 m Updated information |
||
| Line 1: | Line 1: | ||
[[File:Basement.png|thumb|270px]] | [[File:Basement.png|thumb|270px]] | ||
The '''Basement''' is a secret feature of [[Geometry Dash]] | The '''Basement''' is a secret feature of [[Geometry Dash]] and [[Geometry Dash World]] (limited), being intoduced in [[Update 2.1]]. It is located through the [[Vault of Secrets]] from a door in the lower right corner, requiring the secret level [[The Challenge]] to be completed. | ||
==Description== | ==Description== | ||
The Basement contains a locked cell, a torch on the left and a skull and chain in the foreground. Initially, there is a chest in the lower right corner which contains a cube. | The Basement contains a locked cell, a torch on the left and a skull and chain in the foreground. Initially, there is a chest in the lower right corner which contains a cube. After selecting the back button during the first visit, a pair of glowing green eyes will appear and an unnamed creature inside, elsewhere referred to by the Keymaster as the ''Demon Guardian'', will exchange dialogue before a series of locks appear to the right. Selecting each lock will provide instructions on how to acquire its respective key, triggering the associated location. | ||
*The blue key is rewarded for completing the [[Gauntlets|Chaos Gauntlet]], which now appears on the gauntlet menu. | |||
*The green key is found in the first large chest from the [[Treasure Room]], which requires 50 chests to be opened. | *The green key is found in the first large chest from the [[Treasure Room]], which requires 50 chests to be opened. | ||
*The orange key is found in the chest in the [[Chamber of Time]], which can now be discovered. | |||
*The orange key is found in the chest in the [[Chamber of Time]]. | Selecting each lock after possessing its respective key will remove it, until all three locks have been removed. This causes the bars to descend from the cell, freeing the Demon Guardian as it is revealed to be green, with shoulders, large horns and a toothy smile. It exchanges dialogue before disappearing in a flash of light, leaving a large chest in its place with rewards, including a purple key which unlocks the [[Gauntlets|Demon Gauntlet]]. Selecting the chest summons the Keymaster, who exchanges additional dialogue, before the chest can be opened. | ||
Selecting each lock after possessing its respective key will remove it, until all three locks have been removed. This causes the bars to descend from the cell, freeing the | |||
==Rewards== | ==Rewards== | ||
<gallery widths=" | <gallery widths="135"> | ||
Cube103.png|Found in the initial chest | Cube103.png|Found in the initial chest | ||
Cube106.png|Found in the chest after the | Cube106.png|Found in the chest after the Demon Guardian is released | ||
DeathEffect12.png|Found in the chest after the | DeathEffect12.png|Found in the chest after the Demon Guardian is released | ||
</gallery> | </gallery> | ||
==Basement exchanges== | |||
==Basement | |||
{{Togglebox | {{Togglebox | ||
|header = | |header = Demon Guardian dialogue | ||
|body = | |body = | ||
After | |||
*<font color="red">Well, well, well.</font> What do we have here? | |||
*You look like someone who is interested in a <font color="blue">deal</font>... | |||
*<font color="yellow">Help</font> me get out of here, and I will make it worth your while. | |||
*See those locks over there? <font color="blue">You will need to unlock them.</font> | |||
*<font color="blue">RubRub</font> locked me in here, for no reason. | |||
*He said there would be chicken. | |||
*<font color="red">There was no chicken...</font> | |||
*I cannot stay here any longer. <font color="red">You must find a way to release me.</font> | |||
Selecting the locks: insert | |||
After the creature has been released, The Creature will say: | After the creature has been released, The Creature will say: | ||
* I... I am free... | * I... I am free... | ||
| Line 45: | Line 48: | ||
** YOU OPENED THE GATE! GAH THIS IS BAD. | ** YOU OPENED THE GATE! GAH THIS IS BAD. | ||
** BAD BAD BAD BAD BAD BAD BAD BAD BAD BAD BAD BAD... | ** BAD BAD BAD BAD BAD BAD BAD BAD BAD BAD BAD BAD... | ||
}} | }} | ||
{{Togglebox | {{Togglebox | ||
|header = | |header = Introductory dialogue | ||
|body = | |body = | ||
Selecting the Basement door without having completed The Challenge will return an ordered response from the Keymaster and will repeat upon reaching the end. | |||
#I keep that door locked. RubRub's orders. | |||
#I've only been down there once, its pretty creepy. | |||
#Just forget about it. | |||
#Some things are best left alone | |||
#Even I don't want to go down there | |||
#Off. Limits. | |||
#Does the word locked mean nothing to you? | |||
#Sorry, I can't let you in. | |||
#Its to dangerous, just stay here. [sic] | |||
#Leave that alone... | |||
#That area is off limits. | |||
After completing The Challenge, the following message will be received from the Keymaster. | |||
*Huh? | |||
**My level... You beat it? | |||
**I guess I underestimated you. It will not happen again. | |||
**... Why are you still here? | |||
**Ah of course, you want a <font color="green">prize</font>. | |||
**RubRub always gives prizes. | |||
**Uhm... Not sure what to... | |||
**Oh I know! | |||
**I left an old chest down in the <font color="orange">basement</font>. | |||
**You can have that as a <font color="green">reward</font>. | |||
**Take the <font color="yellow">door</font> on the right, I will open it for you. | |||
**Grab the chest and come back... <font color="red">DONT TOUCH ANYTHING</font>! | |||
}} | }} | ||
==Gallery== | |||
<gallery> | |||
DemonGuardianDialogue01.png | |||
DemonGuardianDialogue02.png | |||
</gallery> | |||
[[Category:Secrets]] | [[Category:Secrets]] | ||
Revision as of 04:00, 28 November 2017

The Basement is a secret feature of Geometry Dash and Geometry Dash World (limited), being intoduced in Update 2.1. It is located through the Vault of Secrets from a door in the lower right corner, requiring the secret level The Challenge to be completed.
Description
The Basement contains a locked cell, a torch on the left and a skull and chain in the foreground. Initially, there is a chest in the lower right corner which contains a cube. After selecting the back button during the first visit, a pair of glowing green eyes will appear and an unnamed creature inside, elsewhere referred to by the Keymaster as the Demon Guardian, will exchange dialogue before a series of locks appear to the right. Selecting each lock will provide instructions on how to acquire its respective key, triggering the associated location.
- The blue key is rewarded for completing the Chaos Gauntlet, which now appears on the gauntlet menu.
- The green key is found in the first large chest from the Treasure Room, which requires 50 chests to be opened.
- The orange key is found in the chest in the Chamber of Time, which can now be discovered.
Selecting each lock after possessing its respective key will remove it, until all three locks have been removed. This causes the bars to descend from the cell, freeing the Demon Guardian as it is revealed to be green, with shoulders, large horns and a toothy smile. It exchanges dialogue before disappearing in a flash of light, leaving a large chest in its place with rewards, including a purple key which unlocks the Demon Gauntlet. Selecting the chest summons the Keymaster, who exchanges additional dialogue, before the chest can be opened.
Rewards
-
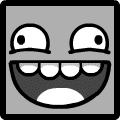 Found in the initial chest
 -
 Found in the chest after the Demon Guardian is released
 -
Found in the chest after the Demon Guardian is released


Basement exchanges
Demon Guardian dialogue
- Well, well, well. What do we have here?
- You look like someone who is interested in a deal...
- Help me get out of here, and I will make it worth your while.
- See those locks over there? You will need to unlock them.
- RubRub locked me in here, for no reason.
- He said there would be chicken.
- There was no chicken...
- I cannot stay here any longer. You must find a way to release me.
Selecting the locks: insert
After the creature has been released, The Creature will say:
- I... I am free...
- So many years lost. Locked away in that filthy cage...
- Now that I have my freedom, I must continue where I left off.
[The Mouth and body of the Creature appears]
- RubRub told me he was cooking some chicken. Then he locked me in.
- Now that you have freed me, I can continue my master plan.
- DESTROY the world of Geometry Dash! And I couldn't have done it without you [username].
- But I almost forgot, I left you a small gift. As a token of my appreciation.
- You should prepare yourself for when I return.
- You will need it...
[The screen flashes, and the Creature is replaced with a chest. The Keymaster then says:]
- Hey I heard some noi...
- Wait... Is the gate...
- ... You opened the gate...
- YOU OPENED THE GATE! GAH THIS IS BAD.
- BAD BAD BAD BAD BAD BAD BAD BAD BAD BAD BAD BAD...
Introductory dialogue
- I keep that door locked. RubRub's orders.
- I've only been down there once, its pretty creepy.
- Just forget about it.
- Some things are best left alone
- Even I don't want to go down there
- Off. Limits.
- Does the word locked mean nothing to you?
- Sorry, I can't let you in.
- Its to dangerous, just stay here. [sic]
- Leave that alone...
- That area is off limits.
After completing The Challenge, the following message will be received from the Keymaster.
- Huh?
- My level... You beat it?
- I guess I underestimated you. It will not happen again.
- ... Why are you still here?
- Ah of course, you want a prize.
- RubRub always gives prizes.
- Uhm... Not sure what to...
- Oh I know!
- I left an old chest down in the basement.
- You can have that as a reward.
- Take the door on the right, I will open it for you.
- Grab the chest and come back... DONT TOUCH ANYTHING!


