
| Reward | Chests | Share of category | Total awarded |
|---|---|---|---|
| 50 mana orbs | 41/400 | 10.25% | 2,050 mana orbs |
| 100 mana orbs | 50/400 | 12.5% | 5,000 mana orbs |
| 200 mana orbs | 44/400 | 11% | 8,800 mana orbs |
| 300 mana orbs | 8/400 | 2% | 2,400 mana orbs |
| 500 mana orbs | 12/400 | 3% | 6,000 mana orbs |
| 1,000 mana orbs | 2/400 | 0.5% | 2,000 mana orbs |
| 5 diamonds | 33/400 | 8.25% | 165 diamonds |
| 10 diamonds | 48/400 | 12% | 480 diamonds |
| 20 diamonds | 26/400 | 6.5% | 520 diamonds |
| 30 diamonds | 4/400 | 1% | 120 diamonds |
| 50 diamonds | 2/400 | 0.5% | 100 diamonds |
| Cube | 30/400 | 7.5% | 30 cubes |
| Ship | 3/400 | 0.75% | 3 ships |
| UFO | 2/400 | 0.5% | 2 UFOs |
| Ball, wave, robot, spider and death effect | 1/400 each | 0.25% each | 1 of each |
| Colour | 12/400 | 3% | 12 colours |
| Each Tier 1 shard | 14/400 | 3.5% | 19 of each shard |
| Each Tier 2 shard | 10/400 | 2.5% | 15 of each shard |
| Total | 442/400 | 110.5% | 442 reward occurrences |
Treasure Room: Difference between revisions
Jump to navigation
Jump to search
geometrydash.wiki.gg>Sightnado mNo edit summary |
m 1 revision imported: Copied from Official Wiki https://geometrydash.wiki.gg/index.php?title=Treasure+Room&oldid=266082 ; contributors: https://geometrydash.wiki.gg/index.php?title=Treasure+Room&action=history |
||
| (39 intermediate revisions by 12 users not shown) | |||
| Line 1: | Line 1: | ||
{{WIP}} | |||
[[File:TreasureRoom01.png| | [[File:TreasureRoom01.png|thumb|right|270px|The Treasure Room]] | ||
The '''Treasure Room''' is a room in [[Geometry Dash]], [[Geometry Dash Lite]] and [[Geometry Dash World]], introduced in [[Update 2.1]]. It is accessed through the door in the lower-right corner of the creator menu. The [[Vault of Secrets|Keymaster]] permanently opens the room once the player collects five [[Collectibles#Keys|Demon Keys]]. | |||
The '''Treasure Room''' is a room in [[Geometry Dash]] and [[Geometry Dash World]], | |||
The room contains 604 regular chests opened with Demon Keys, three bonus chests unlocked after opening a specified number of regular chests, 30 chests opened with Gold Keys, and entrances to four [[shop]]s. Its selection and layout were expanded substantially in [[Update 2.2]]. | |||
The | |||
==Access== | |||
Before the player has collected five Demon Keys, selecting the Treasure Room door summons the Keymaster, who states how many more keys are required. After collecting the fifth key and selecting the door again, the Keymaster permanently opens it. Entering the room does not consume those five keys; the player spends keys only when opening individual chests. | |||
Demon Keys are primarily awarded as the player collects eligible [[Collectibles#Mana orbs|mana orbs]], with one key awarded for every 500. The player can also obtain them directly from certain reward chests and [[Event Level]]s. Players obtain Gold Keys from the reward chests of selected Event Levels and spend them separately from Demon Keys. | |||
The | ==Layout== | ||
The Treasure Room has five main screens: the first two lead to six categories of regular chests, separated into Tier 1 and Tier 2. A chest's cost is displayed beneath it, and trying to open one without enough keys prompts the Keymaster to state the remaining requirement. | |||
{| class="wikitable" style="width:100%;" | |||
! Screen !! Chest category !! Chests !! Cost per chest !! Cost of category | |||
{| class=" | |||
! | |||
! | |||
! | |||
! | |||
! | |||
! | |||
! | |||
! | |||
! | |||
|- | |- | ||
| rowspan="3" | Tier 1 || 1-key || 400 || 1 Demon Key || 400 Demon Keys | |||
|- | |- | ||
| 5-key || 100 || 5 Demon Keys || 500 Demon Keys | |||
|- | |- | ||
| 10-key || 60 || 10 Demon Keys || 600 Demon Keys | |||
|- | |- | ||
| rowspan="3" | Tier 2 || 25-key || 24 || 25 Demon Keys || 600 Demon Keys | |||
|- | |- | ||
| 50-key || 12 || 50 Demon Keys || 600 Demon Keys | |||
|- | |- | ||
| 100-key || 8 || 100 Demon Keys || 800 Demon Keys | |||
|- | |- | ||
! colspan="2" | | ! colspan="2" | Total !! 604 !! — !! 3,500 Demon Keys | ||
! | |||
! | |||
! | |||
! | |||
! | |||
! | |||
|} | |} | ||
The regular chests use a finite reward pool for each category. The game randomises where that category's rewards are placed; selecting a different unopened chest does not choose from a newly rerolled set of independent odds. Contents include mana orbs, diamonds, shards, colours and [[Icon Kit]] items. Higher-cost categories generally contain larger currency rewards and more cosmetic items. Opening every regular chest costs 3,500 Demon Keys. | |||
===Bonus chests=== | |||
The third screen contains three bonus chests. They cost no keys and become available after opening the required number of regular Treasure Room chests. | |||
{| class=" | {| class="wikitable" | ||
! Requirement !! Rewards !! Additional function | |||
! | |||
! | |||
! | |||
! | |||
|- | |- | ||
| 50 chests opened || [[File:Ball023.png|24px]] Ball 23 and [[File:GreenKey.png|24px]] Green Key || The Green Key removes the corresponding lock in the [[Basement]]. | |||
|- | |- | ||
| 100 chests opened || [[File:Cube104.png|24px]] Cube 104 || — | |||
|- | |||
| 200 chests opened || [[File:UFO027.png|24px]] UFO 27 || — | |||
|} | |||
===Gold chests=== | |||
The fourth screen contains 30 Gold Chests. Each costs one Gold Key and awards the next reward in a fixed sequence; their on-screen position does not let the player choose a later reward. Once all 20 have been opened, the Keymaster states that no Gold Chests remain. The complete set costs 30 Gold Keys. | |||
! | {| class="wikitable" | ||
! | |+ Gold Chest reward sequence | ||
! | ! Chest !! Cosmetic !! Other rewards | ||
|- | |- | ||
| 1 || Cube 157 || — | |||
|- | |- | ||
| 2 || Ship 133 || 1,000 mana orbs | |||
|- | |- | ||
| 3 || Cube 170 || 20 diamonds | |||
|- | |- | ||
| 4 || Ship 165 || 30 diamonds | |||
|- | |- | ||
| 5 || Swing 5 || 1,500 mana orbs and 15 diamonds | |||
|- | |- | ||
| 6 || Cube 183 || 2,000 mana orbs | |||
|- | |- | ||
| 7 || Wave 95 || 1,000 mana orbs and 10 diamonds | |||
|- | |- | ||
| 8 || Cube 258 || 30 diamonds | |||
|- | |- | ||
| 9 || Ball 100 || 30 diamonds | |||
|- | |- | ||
| 10 || UFO 43 || 2,000 mana orbs | |||
|- | |- | ||
| 11 || Cube 357 || 2,000 mana orbs | |||
|- | |- | ||
| 12 || Swing 24 || 30 diamonds | |||
|- | |- | ||
| 13 || Spider 33 || 30 diamonds | |||
|- | |- | ||
| 14 || Ship 139 || 30 diamonds | |||
|- | |- | ||
| 15 || Cube 283 || 30 diamonds | |||
|- | |- | ||
| 16 || Wave 88 || 2,000 mana orbs | |||
|- | |- | ||
| 17 || Ball 74 || 1,000 mana orbs and 10 diamonds | |||
|- | |- | ||
| 18 || Ship 147 || 2,000 mana orbs | |||
|- | |- | ||
| 19 || UFO 66 || 30 diamonds | |||
|- | |- | ||
| 20 || Spider 31 || 30 diamonds | |||
|- | |- | ||
| 21 || || | |||
|- | |- | ||
| 22 || || | |||
|- | |- | ||
| 23 || || | |||
|- | |- | ||
| 24 || || | |||
|- | |- | ||
| 25 || || | |||
|- | |- | ||
| 26 || || | |||
|- | |- | ||
| 27 || || | |||
|- | |- | ||
| 28 || || | |||
|- | |- | ||
| 29 || || | |||
|- | |- | ||
| 30 || || | |||
|- | |- | ||
! | ! Total !! 30 cosmetics !! 14,500+ mana orbs and 325+ diamonds | ||
! | |||
! | |||
! | |||
! | |||
|} | |} | ||
===Shops=== | |||
The fifth screen contains four hanging ropes leading to shops. Access depends on the player's total collected diamonds; entering a shop does not spend them. | |||
{| class=" | {| class="wikitable" | ||
! Rope !! Shop !! Access requirement !! Currency used inside | |||
! | |||
! | |||
! | |||
! | |||
|- | |- | ||
| First || [[Secret Shop]] || 500 diamonds || Mana orbs | |||
|- | |- | ||
| Second || [[Community Shop]] || 200 diamonds || Mana orbs | |||
|- | |- | ||
| Third || [[Mechanic]] || 2,000 diamonds || Mana orbs | |||
|- | |- | ||
| Fourth || [[Diamond Shop]] || 1,000 diamonds || Diamond shards | |||
|} | |||
==Demon Key chest rewards== | |||
Each table describes the complete finite pool for its chest category. 'Chests' is the number of chests containing that reward, not the probability of an independent reroll. A chest can contain several rewards so that the total occurrence can exceed the number of chests. | |||
! | |||
<tabber> | |||
1-key= | |||
{| class="wikitable" | |||
! Reward !! Chests !! Share of category !! Total awarded | |||
|- | |- | ||
| 50 mana orbs || 41/400 || 10.25% || 2,050 mana orbs | |||
|- | |- | ||
| 100 mana orbs || 50/400 || 12.5% || 5,000 mana orbs | |||
|- | |- | ||
| 200 mana orbs || 44/400 || 11% || 8,800 mana orbs | |||
|- | |- | ||
| 300 mana orbs || 8/400 || 2% || 2,400 mana orbs | |||
|- | |- | ||
| 500 mana orbs || 12/400 || 3% || 6,000 mana orbs | |||
|- | |- | ||
| 1,000 mana orbs || 2/400 || 0.5% || 2,000 mana orbs | |||
|- | |- | ||
| 5 diamonds || 33/400 || 8.25% || 165 diamonds | |||
|- | |- | ||
| 10 diamonds || 48/400 || 12% || 480 diamonds | |||
|- | |- | ||
| 20 diamonds || 26/400 || 6.5% || 520 diamonds | |||
|- | |- | ||
| 30 diamonds || 4/400 || 1% || 120 diamonds | |||
|- | |- | ||
| 50 diamonds || 2/400 || 0.5% || 100 diamonds | |||
|- | |- | ||
| Cube || 30/400 || 7.5% || 30 cubes | |||
|- | |- | ||
| Ship || 3/400 || 0.75% || 3 ships | |||
|- | |- | ||
| UFO || 2/400 || 0.5% || 2 UFOs | |||
|- | |- | ||
| Ball, wave, robot, spider and death effect || 1/400 each || 0.25% each || 1 of each | |||
|- | |- | ||
| Colour || 12/400 || 3% || 12 colours | |||
|- | |- | ||
| Each Tier 1 shard || 14/400 || 3.5% || 19 of each shard | |||
|- | |- | ||
| Each Tier 2 shard || 10/400 || 2.5% || 15 of each shard | |||
|- | |- | ||
! | ! Total !! 442/400 !! 110.5% !! 442 reward occurrences | ||
! | |||
! | |||
! | |||
! | |||
! | |||
|} | |} | ||
The pool averages 1.105 reward occurrences per chest, awarding 26,250 mana orbs and 1,385 diamonds in total. | |||
|-| | |-| | ||
5-key= | |||
{| class=" | {| class="wikitable" | ||
! Reward !! Chests !! Share of category !! Total awarded | |||
! | |||
! | |||
! | |||
! | |||
|- | |- | ||
| 500 mana orbs || 5/100 || 5% || 2,500 mana orbs | |||
|- | |- | ||
| 1,000 mana orbs || 11/100 || 11% || 11,000 mana orbs | |||
|- | |- | ||
| 1,500 mana orbs || 2/100 || 2% || 3,000 mana orbs | |||
|- | |- | ||
| 2,000 mana orbs || 9/100 || 9% || 18,000 mana orbs | |||
|- | |- | ||
| 2,500 mana orbs || 2/100 || 2% || 5,000 mana orbs | |||
|- | |- | ||
| 3,000 mana orbs || 4/100 || 4% || 12,000 mana orbs | |||
|- | |- | ||
| 4,000 mana orbs || 1/100 || 1% || 4,000 mana orbs | |||
|- | |- | ||
| 5,000 mana orbs || 1/100 || 1% || 5,000 mana orbs | |||
|- | |- | ||
| 10 diamonds || 10/100 || 10% || 100 diamonds | |||
|- | |- | ||
| 20 diamonds || 6/100 || 6% || 120 diamonds | |||
|- | |- | ||
| 30 diamonds || 3/100 || 3% || 90 diamonds | |||
|- | |- | ||
| 40 and 50 diamonds || 2/100 each || 2% each || 80 and 100 diamonds | |||
|- | |- | ||
| 60, 70, 80, 90 and 100 diamonds || 1/100 each || 1% each || 400 diamonds combined | |||
|- | |- | ||
| Cube || 17/100 || 17% || 17 cubes | |||
|- | |- | ||
| Ball, wave and UFO || 3/100 each || 3% each || 3 of each | |||
|- | |- | ||
| Ship, robot and death effect || 2/100 each || 2% each || 2 of each | |||
|- | |- | ||
| Spider || 1/100 || 1% || 1 spider | |||
|- | |- | ||
| Each Tier 1 shard || 2/100 || 2% || 10 of each shard | |||
|- | |- | ||
| Each Tier 2 shard || 2/100 || 2% || 10 of each shard | |||
|- | |- | ||
! | ! Total !! 116/100 !! 116% !! 116 reward occurrences | ||
! | |} | ||
! | The pool averages 1.16 reward occurrences per chest, awarding 60,500 mana orbs and 890 diamonds in total. | ||
! | |||
! | |||
|} | |||
|-| | |-| | ||
10-key= | |||
{| class=" | {| class="wikitable" | ||
! Reward !! Chests !! Share of category !! Total awarded | |||
! | |||
! | |||
! | |||
! | |||
|- | |- | ||
| 1,500 mana orbs || 7/60 || 11.7% || 10,500 mana orbs | |||
|- | |- | ||
| 2,000 mana orbs || 4/60 || 6.7% || 8,000 mana orbs | |||
|- | |- | ||
| 4,000 mana orbs || 4/60 || 6.7% || 16,000 mana orbs | |||
|- | |- | ||
| 10 diamonds || 1/60 || 1.7% || 10 diamonds | |||
|- | |- | ||
| 15 diamonds || 6/60 || 10% || 90 diamonds | |||
|- | |- | ||
| 20 diamonds || 5/60 || 8.3% || 100 diamonds | |||
|- | |- | ||
| 30 diamonds || 6/60 || 10% || 180 diamonds | |||
|- | |- | ||
| 40 diamonds || 2/60 || 3.3% || 80 diamonds | |||
|- | |- | ||
| 50 diamonds || 8/60 || 13.3% || 400 diamonds | |||
|- | |- | ||
| Cube || 30/60 || 50% || 30 cubes | |||
|- | |- | ||
| Ball and ship || 4/60 each || 6.7% each || 4 of each | |||
|- | |- | ||
| Spider, swing and UFO || 3/60 each || 5% each || 3 of each | |||
|- | |- | ||
| Robot and wave || 2/60 each || 3.3% each || 2 of each | |||
|- | |- | ||
| Colour || 9/60 || 15% || 9 colours | |||
|- | |- | ||
| Each Tier 1 shard || 2/60 || 3.3% || 10 of each shard | |||
|- | |- | ||
| Each Tier 2 shard || 2/60 || 3.3% || 10 of each shard | |||
|- | |- | ||
! | ! Total !! 123/60 !! 205% !! 123 reward occurrences | ||
! | |||
! | |||
! | |||
! | |||
! | |||
! | |||
|} | |} | ||
The pool averages 2.05 reward occurrences per chest, awarding 34,500 mana orbs and 860 diamonds in total. | |||
|-| | |-| | ||
25-key= | |||
{| class=" | {| class="wikitable" | ||
! Reward !! Chests !! Share of category !! Total awarded | |||
! | |||
! | |||
! | |||
! | |||
|- | |- | ||
| 50 diamonds || 10/24 || 41.7% || 500 diamonds | |||
|- | |- | ||
| 100 diamonds || 14/24 || 58.3% || 1,400 diamonds | |||
|- | |- | ||
| Cube and UFO || 6/24 each || 25% each || 6 of each | |||
|- | |- | ||
| Ship and swing || 3/24 each || 12.5% each || 3 of each | |||
|- | |- | ||
| Ball, robot and wave || 2/24 each || 8.3% each || 2 of each | |||
|- | |- | ||
| Colour || 24/24 || 100% || 24 colours | |||
|- | |- | ||
| Each Tier 1 shard || 1/24 || 4.2% || 5 of each shard | |||
|- | |- | ||
| Each Tier 2 shard || 1/24 || 4.2% || 5 of each shard | |||
|- | |- | ||
! | ! Total !! 82/24 !! 341.7% !! 82 reward occurrences | ||
! | |} | ||
! | The pool averages about 3.42 reward occurrences per chest and awards 1,900 diamonds in total. | ||
! | |-| | ||
50-key= | |||
{| class="wikitable" | |||
! Reward !! Chests !! Share of category !! Total awarded | |||
|- | |- | ||
| 100 diamonds || 12/12 || 100% || 1,200 diamonds | |||
|- | |- | ||
| Cube || 9/12 || 75% || 9 cubes | |||
|- | |- | ||
| Ship || 4/12 || 33.3% || 4 ships | |||
|- | |- | ||
| UFO || 3/12 || 25% || 3 UFOs | |||
|- | |- | ||
| Ball, wave, robot and spider || 2/12 each || 16.7% each || 2 of each | |||
|- | |- | ||
| Colour || 12/12 || 100% || 12 colours | |||
|- | |- | ||
| Each Tier 1 shard || 1/12 || 8.3% || 5 of each shard | |||
|- | |- | ||
| Each Tier 2 shard || 1/12 || 8.3% || 5 of each shard | |||
|- | |- | ||
| Additional Shadow and Lava shards || 1/12 each || 8.3% each || 10 additional shards of each | |||
| | |||
| | |||
| | |||
| | |||
| | |||
| | |||
|- | |- | ||
! | ! Total !! 60/12 !! 500% !! 60 reward occurrences | ||
! | |||
! | |||
! | |||
|} | |} | ||
The pool averages 5 reward occurrences per chest and awards 1,200 diamonds in total. | |||
|-| | |-| | ||
100-key= | |||
{| class=" | {| class="wikitable" | ||
! Reward !! Chests !! Share of category !! Total awarded | |||
! | |||
! | |||
! | |||
! | |||
|- | |- | ||
| 500 diamonds || 8/8 || 100% || 4,000 diamonds | |||
| | |||
| | |||
| | |||
|- | |- | ||
| Cube || 8/8 || 100% || 8 cubes | |||
|- | |- | ||
| Ship || 7/8 || 87.5% || 7 ships | |||
|- | |- | ||
| Spider and UFO || 4/8 each || 50% each || 4 of each | |||
|- | |- | ||
| Swing || 3/8 || 37.5% || 3 swings | |||
|- | |- | ||
| Ball, robot and wave || 2/8 each || 25% each || 2 of each | |||
|- | |- | ||
| Fire, Ice and Poison shards || 1/8 each || 12.5% each || 10 of each shard | |||
|- | |- | ||
| Each Tier 2 shard || 1/8 || 12.5% || 10 of each shard | |||
|- | |- | ||
! | ! Total !! 48/8 !! 600% !! 48 reward occurrences | ||
! | |||
! | |||
! | |||
|} | |} | ||
The pool averages 6 reward occurrences per chest and awards 4,000 diamonds in total. | |||
</tabber> | </tabber> | ||
===Cosmetic reward IDs=== | |||
The galleries identify every cosmetic in each finite chest pool by its in-game ID. Primary and secondary colour rewards are distinguished where applicable. | |||
{{Togglebox | {{Togglebox | ||
|header = | |header = Cosmetic reward IDs | ||
|body = | |body = | ||
<tabber> | <tabber> | ||
1 Key chest= | 1 Key chest= | ||
<gallery | '''Cubes''' | ||
Cube097.png | <gallery mode="nolines" widths="160" heights="100" class="icon-gallery"> | ||
Cube163.png | Cube097.png|Cube 97 | ||
Cube167.png | Cube163.png|Cube 163 | ||
Cube176.png | Cube167.png|Cube 167 | ||
Cube179.png | Cube176.png|Cube 176 | ||
Cube189.png | Cube179.png|Cube 179 | ||
Cube245.png | Cube189.png|Cube 189 | ||
Cube249.png | Cube245.png|Cube 245 | ||
Cube255.png | Cube249.png|Cube 249 | ||
Cube278.png | Cube255.png|Cube 255 | ||
Cube281.png | Cube278.png|Cube 278 | ||
Cube282.png | Cube281.png|Cube 281 | ||
Cube285.png | Cube282.png|Cube 282 | ||
Cube287.png | Cube285.png|Cube 285 | ||
Cube294.png | Cube287.png|Cube 287 | ||
Cube302.png | Cube294.png|Cube 294 | ||
Cube313.png | Cube302.png|Cube 302 | ||
Cube333.png | Cube313.png|Cube 313 | ||
Cube334.png | Cube333.png|Cube 333 | ||
Cube335.png | Cube334.png|Cube 334 | ||
Cube348.png | Cube335.png|Cube 335 | ||
Cube350.png | Cube348.png|Cube 348 | ||
Cube353.png | Cube350.png|Cube 350 | ||
Cube373.png | Cube353.png|Cube 353 | ||
Cube376.png | Cube373.png|Cube 373 | ||
Cube391.png | Cube376.png|Cube 376 | ||
Cube414.png | Cube391.png|Cube 391 | ||
Cube420.png | Cube414.png|Cube 414 | ||
Cube426.png | Cube420.png|Cube 420 | ||
Ship026.png | Cube426.png|Cube 426 | ||
Ship069.png | </gallery> | ||
Ship083.png | |||
'''Ships''' | |||
<gallery mode="nolines" widths="160" heights="100" class="icon-gallery"> | |||
Ship026.png|Ship 26 | |||
Ship069.png|Ship 69 | |||
Ship083.png|Ship 83 | |||
</gallery> | |||
'''Balls''' | |||
<gallery mode="nolines" widths="160" heights="100" class="icon-gallery"> | |||
Ball021.png|Ball 21 | |||
</gallery> | |||
'''UFOs''' | |||
<gallery mode="nolines" widths="160" heights="100" class="icon-gallery"> | |||
UFO019.png|UFO 19 | |||
UFO118.png|UFO 118 | |||
</gallery> | |||
'''Waves''' | |||
<gallery mode="nolines" widths="160" heights="100" class="icon-gallery"> | |||
Wave016.png|Wave 16 | |||
</gallery> | |||
'''Robots''' | |||
<gallery mode="nolines" widths="160" heights="100" class="icon-gallery"> | |||
Robot010.png|Robot 10 | |||
</gallery> | |||
'''Spiders''' | |||
<gallery mode="nolines" widths="160" heights="100" class="icon-gallery"> | |||
Spider007.png|Spider 7 | |||
</gallery> | |||
'''Death effects''' | |||
<gallery mode="nolines" widths="160" heights="100" class="icon-gallery"> | |||
DeathEffect003.png|Death Effect 3 | |||
</gallery> | |||
'''Colours''' | |||
<gallery mode="nolines" widths="160" heights="100" class="icon-gallery"> | |||
Colour041.png|Colour 41 (primary) | |||
Colour101.png|Colour 101 (primary) | |||
Colour040.png|Colour 40 (secondary) | |||
Colour058.png|Colour 58 (secondary) | |||
Colour061.png|Colour 61 (secondary) | |||
Colour063.png|Colour 63 (secondary) | |||
Colour066.png|Colour 66 (secondary) | |||
Colour067.png|Colour 67 (secondary) | |||
Colour069.png|Colour 69 (secondary) | |||
Colour076.png|Colour 76 (secondary) | |||
Colour078.png|Colour 78 (secondary) | |||
Colour080.png|Colour 80 (secondary) | |||
</gallery> | </gallery> | ||
|-| | |-| | ||
5 Key chest= | 5 Key chest= | ||
<gallery | '''Cubes''' | ||
Cube112.png | <gallery mode="nolines" widths="160" heights="100" class="icon-gallery"> | ||
Cube114.png | Cube112.png|Cube 112 | ||
Cube115.png | Cube114.png|Cube 114 | ||
Cube116.png | Cube115.png|Cube 115 | ||
Cube137.png | Cube116.png|Cube 116 | ||
Cube155.png | Cube137.png|Cube 137 | ||
Cube171.png | Cube155.png|Cube 155 | ||
Cube175.png | Cube171.png|Cube 171 | ||
Cube177.png | Cube175.png|Cube 175 | ||
Cube180.png | Cube177.png|Cube 177 | ||
Cube265.png | Cube180.png|Cube 180 | ||
Cube269.png | Cube265.png|Cube 265 | ||
Cube273.png | Cube269.png|Cube 269 | ||
Cube289.png | Cube273.png|Cube 273 | ||
Cube291.png | Cube289.png|Cube 289 | ||
Cube322.png | Cube291.png|Cube 291 | ||
Cube330.png | Cube322.png|Cube 322 | ||
Ship051.png | Cube330.png|Cube 330 | ||
Ship073.png | </gallery> | ||
Ball039.png | |||
Ball042.png | '''Ships''' | ||
Ball058.png | <gallery mode="nolines" widths="160" heights="100" class="icon-gallery"> | ||
UFO053.png | Ship051.png|Ship 51 | ||
UFO056.png | Ship073.png|Ship 73 | ||
UFO097.png | </gallery> | ||
Wave034.png | |||
Wave042.png | '''Balls''' | ||
Wave076.png | <gallery mode="nolines" widths="160" heights="100" class="icon-gallery"> | ||
Ball039.png|Ball 39 | |||
Ball042.png|Ball 42 | |||
Ball058.png|Ball 58 | |||
</gallery> | |||
'''UFOs''' | |||
<gallery mode="nolines" widths="160" heights="100" class="icon-gallery"> | |||
UFO053.png|UFO 53 | |||
UFO056.png|UFO 56 | |||
UFO097.png|UFO 97 | |||
</gallery> | |||
'''Waves''' | |||
<gallery mode="nolines" widths="160" heights="100" class="icon-gallery"> | |||
Wave034.png|Wave 34 | |||
Wave042.png|Wave 42 | |||
Wave076.png|Wave 76 | |||
</gallery> | |||
'''Robots''' | |||
<gallery mode="nolines" widths="160" heights="100" class="icon-gallery"> | |||
Robot026.png|Robot 26 | |||
Robot030.png|Robot 30 | |||
</gallery> | |||
'''Spiders''' | |||
<gallery mode="nolines" widths="160" heights="100" class="icon-gallery"> | |||
Spider017.png|Spider 17 | |||
</gallery> | |||
'''Death effects''' | |||
<gallery mode="nolines" widths="160" heights="100" class="icon-gallery"> | |||
DeathEffect014.png|Death Effect 14 | |||
DeathEffect015.png|Death Effect 15 | |||
</gallery> | </gallery> | ||
|-| | |-| | ||
10 Key chest= | 10 Key chest= | ||
<gallery | '''Cubes''' | ||
Cube212.png | <gallery mode="nolines" widths="160" heights="100" class="icon-gallery"> | ||
Cube218.png | Cube212.png|Cube 212 | ||
Cube228.png | Cube218.png|Cube 218 | ||
Cube256.png | Cube228.png|Cube 228 | ||
Cube259.png | Cube256.png|Cube 256 | ||
Cube298.png | Cube259.png|Cube 259 | ||
Cube300.png | Cube298.png|Cube 298 | ||
Cube318.png | Cube300.png|Cube 300 | ||
Cube328.png | Cube318.png|Cube 318 | ||
Cube331.png | Cube328.png|Cube 328 | ||
Cube336.png | Cube331.png|Cube 331 | ||
Cube338.png | Cube336.png|Cube 336 | ||
Cube340.png | Cube338.png|Cube 338 | ||
Cube345.png | Cube340.png|Cube 340 | ||
Cube349.png | Cube345.png|Cube 345 | ||
Cube355.png | Cube349.png|Cube 349 | ||
Cube366.png | Cube355.png|Cube 355 | ||
Cube374.png | Cube366.png|Cube 366 | ||
Cube380.png | Cube374.png|Cube 374 | ||
Cube382.png | Cube380.png|Cube 380 | ||
Cube389.png | Cube382.png|Cube 382 | ||
Cube392.png | Cube389.png|Cube 389 | ||
Cube398.png | Cube392.png|Cube 392 | ||
Cube402.png | Cube398.png|Cube 398 | ||
Cube410.png | Cube402.png|Cube 402 | ||
Cube418.png | Cube410.png|Cube 410 | ||
Cube432.png | Cube418.png|Cube 418 | ||
Cube437.png | Cube432.png|Cube 432 | ||
Cube441.png | Cube437.png|Cube 437 | ||
Cube461.png | Cube441.png|Cube 441 | ||
Ship064.png | Cube461.png|Cube 461 | ||
Ship071.png | </gallery> | ||
Ship089.png | |||
Ship110.png | '''Ships''' | ||
Ball085.png | <gallery mode="nolines" widths="160" heights="100" class="icon-gallery"> | ||
Ball087.png | Ship064.png|Ship 64 | ||
Ball101.png | Ship071.png|Ship 71 | ||
Ball109.png | Ship089.png|Ship 89 | ||
UFO081.png | Ship110.png|Ship 110 | ||
UFO103.png | </gallery> | ||
UFO123.png | |||
'''Balls''' | |||
<gallery mode="nolines" widths="160" heights="100" class="icon-gallery"> | |||
Ball085.png|Ball 85 | |||
Ball087.png|Ball 87 | |||
Ball101.png|Ball 101 | |||
Ball109.png|Ball 109 | |||
</gallery> | |||
'''UFOs''' | |||
<gallery mode="nolines" widths="160" heights="100" class="icon-gallery"> | |||
UFO081.png|UFO 81 | |||
UFO103.png|UFO 103 | |||
UFO123.png|UFO 123 | |||
</gallery> | |||
'''Waves''' | |||
<gallery mode="nolines" widths="160" heights="100" class="icon-gallery"> | |||
Wave054.png|Wave 54 | |||
Wave091.png|Wave 91 | |||
</gallery> | |||
'''Robots''' | |||
<gallery mode="nolines" widths="160" heights="100" class="icon-gallery"> | |||
Robot027.png|Robot 27 | |||
Robot061.png|Robot 61 | |||
</gallery> | |||
'''Spiders''' | |||
<gallery mode="nolines" widths="160" heights="100" class="icon-gallery"> | |||
Spider034.png|Spider 34 | |||
Spider052.png|Spider 52 | |||
Spider063.png|Spider 63 | |||
</gallery> | |||
'''Swings''' | |||
<gallery mode="nolines" widths="160" heights="100" class="icon-gallery"> | |||
Swing014.png|Swing 14 | |||
Swing028.png|Swing 28 | |||
Swing029.png|Swing 29 | |||
</gallery> | |||
'''Colours''' | |||
<gallery mode="nolines" widths="160" heights="100" class="icon-gallery"> | |||
Colour064.png|Colour 64 (secondary) | |||
Colour075.png|Colour 75 (secondary) | |||
Colour081.png|Colour 81 (secondary) | |||
Colour082.png|Colour 82 (secondary) | |||
Colour083.png|Colour 83 (secondary) | |||
Colour084.png|Colour 84 (secondary) | |||
Colour101.png|Colour 101 (secondary) | |||
Colour103.png|Colour 103 (secondary) | |||
Colour105.png|Colour 105 (secondary) | |||
</gallery> | </gallery> | ||
|-| | |-| | ||
25 Key chest= | 25 Key chest= | ||
<gallery | '''Cubes''' | ||
Cube293.png | <gallery mode="nolines" widths="160" heights="100" class="icon-gallery"> | ||
Cube295.png | Cube293.png|Cube 293 | ||
Cube404.png | Cube295.png|Cube 295 | ||
Cube405.png | Cube404.png|Cube 404 | ||
Cube406.png | Cube405.png|Cube 405 | ||
Cube419.png | Cube406.png|Cube 406 | ||
Ship059.png | Cube419.png|Cube 419 | ||
Ship072.png | </gallery> | ||
Ship112.png | |||
Ball088.png | '''Ships''' | ||
Ball089.png | <gallery mode="nolines" widths="160" heights="100" class="icon-gallery"> | ||
UFO039.png | Ship059.png|Ship 59 | ||
UFO058.png | Ship072.png|Ship 72 | ||
UFO061.png | Ship112.png|Ship 112 | ||
UFO067.png | </gallery> | ||
UFO099.png | |||
UFO126.png | '''Balls''' | ||
Wave047.png | <gallery mode="nolines" widths="160" heights="100" class="icon-gallery"> | ||
Wave073.png | Ball088.png|Ball 88 | ||
Robot064.png | Ball089.png|Ball 89 | ||
Robot067.png | </gallery> | ||
Swing011.png | |||
Swing013.png | '''UFOs''' | ||
Swing043.png | <gallery mode="nolines" widths="160" heights="100" class="icon-gallery"> | ||
Colour042.png| | UFO039.png|UFO 39 | ||
Colour043.png| | UFO058.png|UFO 58 | ||
Colour046.png| | UFO061.png|UFO 61 | ||
Colour047.png| | UFO067.png|UFO 67 | ||
Colour050.png| | UFO099.png|UFO 99 | ||
Colour055.png| | UFO126.png|UFO 126 | ||
Colour066.png| | </gallery> | ||
Colour067.png| | |||
Colour068.png| | '''Waves''' | ||
Colour069.png| | <gallery mode="nolines" widths="160" heights="100" class="icon-gallery"> | ||
Colour070.png| | Wave047.png|Wave 47 | ||
Colour072.png| | Wave073.png|Wave 73 | ||
Colour073.png| | </gallery> | ||
Colour075.png| | |||
Colour078.png| | '''Robots''' | ||
Colour079.png| | <gallery mode="nolines" widths="160" heights="100" class="icon-gallery"> | ||
Colour081.png| | Robot064.png|Robot 64 | ||
Colour087.png| | Robot067.png|Robot 67 | ||
Colour088.png| | </gallery> | ||
Colour090.png| | |||
Colour042.png| | '''Swings''' | ||
Colour060.png| | <gallery mode="nolines" widths="160" heights="100" class="icon-gallery"> | ||
Colour074.png| | Swing011.png|Swing 11 | ||
Colour098.png| | Swing013.png|Swing 13 | ||
Swing043.png|Swing 43 | |||
</gallery> | |||
'''Colours''' | |||
<gallery mode="nolines" widths="160" heights="100" class="icon-gallery"> | |||
Colour042.png|Colour 42 (primary) | |||
Colour043.png|Colour 43 (primary) | |||
Colour046.png|Colour 46 (primary) | |||
Colour047.png|Colour 47 (primary) | |||
Colour050.png|Colour 50 (primary) | |||
Colour055.png|Colour 55 (primary) | |||
Colour066.png|Colour 66 (primary) | |||
Colour067.png|Colour 67 (primary) | |||
Colour068.png|Colour 68 (primary) | |||
Colour069.png|Colour 69 (primary) | |||
Colour070.png|Colour 70 (primary) | |||
Colour072.png|Colour 72 (primary) | |||
Colour073.png|Colour 73 (primary) | |||
Colour075.png|Colour 75 (primary) | |||
Colour078.png|Colour 78 (primary) | |||
Colour079.png|Colour 79 (primary) | |||
Colour081.png|Colour 81 (primary) | |||
Colour087.png|Colour 87 (primary) | |||
Colour088.png|Colour 88 (primary) | |||
Colour090.png|Colour 90 (primary) | |||
Colour042.png|Colour 42 (secondary) | |||
Colour060.png|Colour 60 (secondary) | |||
Colour074.png|Colour 74 (secondary) | |||
Colour098.png|Colour 98 (secondary) | |||
</gallery> | </gallery> | ||
|-| | |-| | ||
50 Key chest= | 50 Key chest= | ||
<gallery | '''Cubes''' | ||
Cube166.png | <gallery mode="nolines" widths="160" heights="100" class="icon-gallery"> | ||
Cube202.png | Cube166.png|Cube 166 | ||
Cube261.png | Cube202.png|Cube 202 | ||
Cube264.png | Cube261.png|Cube 261 | ||
Cube280.png | Cube264.png|Cube 264 | ||
Cube301.png | Cube280.png|Cube 280 | ||
Cube361.png | Cube301.png|Cube 301 | ||
Cube384.png | Cube361.png|Cube 361 | ||
Cube393.png | Cube384.png|Cube 384 | ||
Ship082.png | Cube393.png|Cube 393 | ||
Ship085.png | </gallery> | ||
Ship097.png | |||
Ship135.png | '''Ships''' | ||
Ball056.png | <gallery mode="nolines" widths="160" heights="100" class="icon-gallery"> | ||
Ball115.png | Ship082.png|Ship 82 | ||
UFO087.png | Ship085.png|Ship 85 | ||
UFO142.png | Ship097.png|Ship 97 | ||
UFO143.png | Ship135.png|Ship 135 | ||
Wave079.png | </gallery> | ||
Wave096.png | |||
Robot036.png | '''Balls''' | ||
Robot050.png | <gallery mode="nolines" widths="160" heights="100" class="icon-gallery"> | ||
Spider047.png | Ball056.png|Ball 56 | ||
Spider062.png | Ball115.png|Ball 115 | ||
Colour044.png| | </gallery> | ||
Colour045.png| | |||
Colour046.png| | '''UFOs''' | ||
Colour048.png| | <gallery mode="nolines" widths="160" heights="100" class="icon-gallery"> | ||
Colour050.png| | UFO087.png|UFO 87 | ||
Colour055.png| | UFO142.png|UFO 142 | ||
Colour087.png| | UFO143.png|UFO 143 | ||
Colour090.png| | </gallery> | ||
Colour092.png| | |||
Colour093.png| | '''Waves''' | ||
Colour095.png| | <gallery mode="nolines" widths="160" heights="100" class="icon-gallery"> | ||
Colour097.png| | Wave079.png|Wave 79 | ||
Wave096.png|Wave 96 | |||
</gallery> | |||
'''Robots''' | |||
<gallery mode="nolines" widths="160" heights="100" class="icon-gallery"> | |||
Robot036.png|Robot 36 | |||
Robot050.png|Robot 50 | |||
</gallery> | |||
'''Spiders''' | |||
<gallery mode="nolines" widths="160" heights="100" class="icon-gallery"> | |||
Spider047.png|Spider 47 | |||
Spider062.png|Spider 62 | |||
</gallery> | |||
'''Colours''' | |||
<gallery mode="nolines" widths="160" heights="100" class="icon-gallery"> | |||
Colour044.png|Colour 44 (secondary) | |||
Colour045.png|Colour 45 (secondary) | |||
Colour046.png|Colour 46 (secondary) | |||
Colour048.png|Colour 48 (secondary) | |||
Colour050.png|Colour 50 (secondary) | |||
Colour055.png|Colour 55 (secondary) | |||
Colour087.png|Colour 87 (secondary) | |||
Colour090.png|Colour 90 (secondary) | |||
Colour092.png|Colour 92 (secondary) | |||
Colour093.png|Colour 93 (secondary) | |||
Colour095.png|Colour 95 (secondary) | |||
Colour097.png|Colour 97 (secondary) | |||
</gallery> | </gallery> | ||
|-| | |-| | ||
100 Key chest= | 100 Key chest= | ||
<gallery | '''Cubes''' | ||
Cube192.png | <gallery mode="nolines" widths="160" heights="100" class="icon-gallery"> | ||
Cube204.png | Cube192.png|Cube 192 | ||
Cube317.png | Cube204.png|Cube 204 | ||
Cube323.png | Cube317.png|Cube 317 | ||
Cube356.png | Cube323.png|Cube 323 | ||
Cube367.png | Cube356.png|Cube 356 | ||
Cube383.png | Cube367.png|Cube 367 | ||
Cube386.png | Cube383.png|Cube 383 | ||
Ship055.png | Cube386.png|Cube 386 | ||
Ship116.png | </gallery> | ||
Ship132.png | |||
Ship136.png | '''Ships''' | ||
Ship138.png | <gallery mode="nolines" widths="160" heights="100" class="icon-gallery"> | ||
Ship160.png | Ship055.png|Ship 55 | ||
Ship169.png | Ship116.png|Ship 116 | ||
Ball069.png | Ship132.png|Ship 132 | ||
Ball084.png | Ship136.png|Ship 136 | ||
UFO042.png | Ship138.png|Ship 138 | ||
UFO077.png | Ship160.png|Ship 160 | ||
UFO094.png | Ship169.png|Ship 169 | ||
UFO106.png | </gallery> | ||
Wave057.png | |||
Wave071.png | '''Balls''' | ||
<gallery mode="nolines" widths="160" heights="100" class="icon-gallery"> | |||
Ball069.png|Ball 69 | |||
Ball084.png|Ball 84 | |||
</gallery> | |||
'''UFOs''' | |||
<gallery mode="nolines" widths="160" heights="100" class="icon-gallery"> | |||
UFO042.png|UFO 42 | |||
UFO077.png|UFO 77 | |||
UFO094.png|UFO 94 | |||
UFO106.png|UFO 106 | |||
</gallery> | |||
'''Waves''' | |||
<gallery mode="nolines" widths="160" heights="100" class="icon-gallery"> | |||
Wave057.png|Wave 57 | |||
Wave071.png|Wave 71 | |||
</gallery> | |||
'''Robots''' | |||
<gallery mode="nolines" widths="160" heights="100" class="icon-gallery"> | |||
Robot044.png|Robot 44 | |||
Robot059.png|Robot 59 | |||
</gallery> | |||
'''Spiders''' | |||
<gallery mode="nolines" widths="160" heights="100" class="icon-gallery"> | |||
Spider041.png|Spider 41 | |||
Spider048.png|Spider 48 | |||
Spider059.png|Spider 59 | |||
Spider061.png|Spider 61 | |||
</gallery> | |||
'''Swings''' | |||
<gallery mode="nolines" widths="160" heights="100" class="icon-gallery"> | |||
Swing004.png|Swing 4 | |||
Swing020.png|Swing 20 | |||
Swing035.png|Swing 35 | |||
</gallery> | </gallery> | ||
|-| | |-| | ||
Gold chest= | Gold chest= | ||
<gallery | '''Cubes''' | ||
Cube157.png | <gallery mode="nolines" widths="160" heights="100" class="icon-gallery"> | ||
Cube170.png | Cube157.png|Cube 157 | ||
Cube183.png | Cube170.png|Cube 170 | ||
Cube258.png | Cube183.png|Cube 183 | ||
Cube283.png | Cube258.png|Cube 258 | ||
Cube357.png|Cube 357 | |||
Cube283.png|Cube 283 | |||
Ship139.png | </gallery> | ||
Ship147.png | |||
'''Ships''' | |||
Ball074.png | <gallery mode="nolines" widths="160" heights="100" class="icon-gallery"> | ||
Ship133.png|Ship 133 | |||
UFO043.png | Ship165.png|Ship 165 | ||
UFO066.png | Ship139.png|Ship 139 | ||
Ship147.png|Ship 147 | |||
</gallery> | |||
'''Balls''' | |||
<gallery mode="nolines" widths="160" heights="100" class="icon-gallery"> | |||
Ball100.png|Ball 100 | |||
Ball074.png|Ball 74 | |||
</gallery> | |||
'''UFOs''' | |||
<gallery mode="nolines" widths="160" heights="100" class="icon-gallery"> | |||
UFO043.png|UFO 43 | |||
UFO066.png|UFO 66 | |||
</gallery> | |||
'''Waves''' | |||
<gallery mode="nolines" widths="160" heights="100" class="icon-gallery"> | |||
Wave095.png|Wave 95 | |||
Wave088.png|Wave 88 | |||
</gallery> | </gallery> | ||
'''Spiders''' | |||
<gallery | <gallery mode="nolines" widths="160" heights="100" class="icon-gallery"> | ||
Spider033.png|Spider 33 | |||
Spider031.png|Spider 31 | |||
</gallery> | |||
'''Swings''' | |||
<gallery mode="nolines" widths="160" heights="100" class="icon-gallery"> | |||
Swing005.png|Swing 5 | |||
Swing024.png|Swing 24 | |||
</gallery> | </gallery> | ||
</tabber> | </tabber> | ||
}} | }} | ||
== | ==History== | ||
Update 2.1 introduced the Treasure Room with 200 one-key chests and 48 five-key chests, arranged in grids of twelve. Opening all 248 chests cost 440 Demon Keys. | |||
Update 2.2 redesigned the room, increased the one-key and five-key collections to 400 and 100 chests respectively, and introduced chest categories costing 10, 25, 50 and 100 Demon Keys. This brought the regular-chest total to 604 and the total cost to 3,500 Demon Keys. The update also added entrances to the Mechanic and Diamond Shop. Update 2.207 introduced Event Levels and their reward chests, providing Gold Keys used by the room's Gold Chests. | |||
*The music | ==Trivia== | ||
*The sprite | *The music played in the Treasure Room is ''Random Song 01'', produced by [[Robert Topala|RobTop]]. It is also used in the [[Vault]]. | ||
*The Keymaster sprite in the insufficient-keys dialogue becomes progressively more shocked for higher-cost chests. | |||
*If all 3,500 Demon Keys are obtained solely through eligible mana-orb progress, they correspond to 1,750,000 mana orbs. Keys awarded directly by chests or Event Levels reduce the required number of mana orbs. | |||
[[File:RandomSong01.mp3]] | |||
{{Togglebox | {{Togglebox | ||
|header = General messages | |header = General messages | ||
|body = | |body = | ||
When trying to open a silver chest without a | When trying to open a silver chest without a Demon Key: | ||
*The Keymaster: You need a key to open this chest. | *The Keymaster: You need a key to open this chest. | ||
When trying to open a larger chest with an insufficient number of | When trying to open a larger chest with an insufficient number of Demon Keys: | ||
*The Keymaster: You need < | *The Keymaster: You need <span style="color:deepskyblue">''<number>''</span> more <span style="color:yellow">keys</span> to open this <span style="color:lime">chest</span> | ||
When trying to open a | When trying to open a bonus chest before meeting its requirement: | ||
*The Keymaster: Unlock < | *The Keymaster: Unlock <span style="color:yellow">#</span> more <span style="color:lime">Chest(s)</span>, and you can collect this bonus. | ||
When trying to open a | When trying to open a Gold Chest without a Gold Key: | ||
*The Keymaster: You need a < | *The Keymaster: You need a <span style="color:yellow">Gold Key</span> to unlock this <span style="color:lime">chest</span>. | ||
When trying to open a Gold Chest after all 20 have been opened: | |||
*All out of <span style="color:yellow">Gold Chests</span> right now. Come back later. | |||
}} | }} | ||
{{Togglebox | {{Togglebox | ||
|header = Introductory dialogue | |header = Introductory dialogue | ||
|body = | |body = | ||
When trying to access the Treasure Room with an insufficient number of keys: | When trying to access the Treasure Room with an insufficient number of keys: | ||
*The Keymaster: Bring me < | *The Keymaster: Bring me <span style="color:yellow">5</span> <span style="color:lime">keys</span>, and I will let you pass. | ||
*The Keymaster: Collect < | *The Keymaster: Collect <span style="color:yellow">4-1</span> more <span style="color:lime">key(s)</span>, and I will let you pass. | ||
After trying to access the Treasure Room with at least | After trying to access the Treasure Room with at least five keys: | ||
*The Keymaster: Well, well, well. Look who it is. | *The Keymaster: Well, well, well. Look who it is. | ||
**I see you have the < | **I see you have the <span style="color:lime">keys</span>. But what comes next? | ||
**The < | **The <span style="color:orange">door</span> is open. Time to find out... | ||
}} | }} | ||
==Gallery== | ==Gallery== | ||
<gallery> | <gallery> | ||
1KeyChest.png|Chest requiring 1 | TreasureRoom02.png|The first set of Treasure Room chests | ||
5KeyChest.png|Chest requiring 5 | TreasureRoom03.png|Another Treasure Room screen | ||
10KeyChest.png|Chest requiring 10 | TreasureRoom04.png|A Treasure Room chest screen | ||
25KeyChest.png|Chest requiring 25 | TreasureRoom05.png|The shop entrances | ||
50KeyChest.png|Chest requiring 50 | 1KeyChest.png|Chest requiring 1 Demon Key | ||
100KeyChest.png|Chest requiring 100 | 5KeyChest.png|Chest requiring 5 Demon Keys | ||
LargeChest.png| | 10KeyChest.png|Chest requiring 10 Demon Keys | ||
GoldChest.png|Chest requiring 1 | 25KeyChest.png|Chest requiring 25 Demon Keys | ||
50KeyChest.png|Chest requiring 50 Demon Keys | |||
100KeyChest.png|Chest requiring 100 Demon Keys | |||
LargeChest.png|Bonus chest requiring other chests to be opened | |||
GoldChest.png|Chest requiring 1 Gold Key | |||
</gallery> | </gallery> | ||
[[Category:Rooms]] | [[Category:Rooms (base content)]] | ||
Latest revision as of 07:03, 16 October 2026

The Treasure Room is a room in Geometry Dash, Geometry Dash Lite and Geometry Dash World, introduced in Update 2.1. It is accessed through the door in the lower-right corner of the creator menu. The Keymaster permanently opens the room once the player collects five Demon Keys.
The room contains 604 regular chests opened with Demon Keys, three bonus chests unlocked after opening a specified number of regular chests, 30 chests opened with Gold Keys, and entrances to four shops. Its selection and layout were expanded substantially in Update 2.2.
Access
[edit | edit source]Before the player has collected five Demon Keys, selecting the Treasure Room door summons the Keymaster, who states how many more keys are required. After collecting the fifth key and selecting the door again, the Keymaster permanently opens it. Entering the room does not consume those five keys; the player spends keys only when opening individual chests.
Demon Keys are primarily awarded as the player collects eligible mana orbs, with one key awarded for every 500. The player can also obtain them directly from certain reward chests and Event Levels. Players obtain Gold Keys from the reward chests of selected Event Levels and spend them separately from Demon Keys.
Layout
[edit | edit source]The Treasure Room has five main screens: the first two lead to six categories of regular chests, separated into Tier 1 and Tier 2. A chest's cost is displayed beneath it, and trying to open one without enough keys prompts the Keymaster to state the remaining requirement.
| Screen | Chest category | Chests | Cost per chest | Cost of category |
|---|---|---|---|---|
| Tier 1 | 1-key | 400 | 1 Demon Key | 400 Demon Keys |
| 5-key | 100 | 5 Demon Keys | 500 Demon Keys | |
| 10-key | 60 | 10 Demon Keys | 600 Demon Keys | |
| Tier 2 | 25-key | 24 | 25 Demon Keys | 600 Demon Keys |
| 50-key | 12 | 50 Demon Keys | 600 Demon Keys | |
| 100-key | 8 | 100 Demon Keys | 800 Demon Keys | |
| Total | 604 | — | 3,500 Demon Keys | |
The regular chests use a finite reward pool for each category. The game randomises where that category's rewards are placed; selecting a different unopened chest does not choose from a newly rerolled set of independent odds. Contents include mana orbs, diamonds, shards, colours and Icon Kit items. Higher-cost categories generally contain larger currency rewards and more cosmetic items. Opening every regular chest costs 3,500 Demon Keys.
Bonus chests
[edit | edit source]The third screen contains three bonus chests. They cost no keys and become available after opening the required number of regular Treasure Room chests.
| Requirement | Rewards | Additional function |
|---|---|---|
| 50 chests opened |  Ball 23 and Ball 23 and  Green Key Green Key |
The Green Key removes the corresponding lock in the Basement. |
| 100 chests opened |  Cube 104 Cube 104 |
— |
| 200 chests opened |  UFO 27 UFO 27 |
— |
Gold chests
[edit | edit source]The fourth screen contains 30 Gold Chests. Each costs one Gold Key and awards the next reward in a fixed sequence; their on-screen position does not let the player choose a later reward. Once all 20 have been opened, the Keymaster states that no Gold Chests remain. The complete set costs 30 Gold Keys.
| Chest | Cosmetic | Other rewards |
|---|---|---|
| 1 | Cube 157 | — |
| 2 | Ship 133 | 1,000 mana orbs |
| 3 | Cube 170 | 20 diamonds |
| 4 | Ship 165 | 30 diamonds |
| 5 | Swing 5 | 1,500 mana orbs and 15 diamonds |
| 6 | Cube 183 | 2,000 mana orbs |
| 7 | Wave 95 | 1,000 mana orbs and 10 diamonds |
| 8 | Cube 258 | 30 diamonds |
| 9 | Ball 100 | 30 diamonds |
| 10 | UFO 43 | 2,000 mana orbs |
| 11 | Cube 357 | 2,000 mana orbs |
| 12 | Swing 24 | 30 diamonds |
| 13 | Spider 33 | 30 diamonds |
| 14 | Ship 139 | 30 diamonds |
| 15 | Cube 283 | 30 diamonds |
| 16 | Wave 88 | 2,000 mana orbs |
| 17 | Ball 74 | 1,000 mana orbs and 10 diamonds |
| 18 | Ship 147 | 2,000 mana orbs |
| 19 | UFO 66 | 30 diamonds |
| 20 | Spider 31 | 30 diamonds |
| 21 | ||
| 22 | ||
| 23 | ||
| 24 | ||
| 25 | ||
| 26 | ||
| 27 | ||
| 28 | ||
| 29 | ||
| 30 | ||
| Total | 30 cosmetics | 14,500+ mana orbs and 325+ diamonds |
Shops
[edit | edit source]The fifth screen contains four hanging ropes leading to shops. Access depends on the player's total collected diamonds; entering a shop does not spend them.
| Rope | Shop | Access requirement | Currency used inside |
|---|---|---|---|
| First | Secret Shop | 500 diamonds | Mana orbs |
| Second | Community Shop | 200 diamonds | Mana orbs |
| Third | Mechanic | 2,000 diamonds | Mana orbs |
| Fourth | Diamond Shop | 1,000 diamonds | Diamond shards |
Demon Key chest rewards
[edit | edit source]Each table describes the complete finite pool for its chest category. 'Chests' is the number of chests containing that reward, not the probability of an independent reroll. A chest can contain several rewards so that the total occurrence can exceed the number of chests.
| Reward | Chests | Share of category | Total awarded |
|---|---|---|---|
| 500 mana orbs | 5/100 | 5% | 2,500 mana orbs |
| 1,000 mana orbs | 11/100 | 11% | 11,000 mana orbs |
| 1,500 mana orbs | 2/100 | 2% | 3,000 mana orbs |
| 2,000 mana orbs | 9/100 | 9% | 18,000 mana orbs |
| 2,500 mana orbs | 2/100 | 2% | 5,000 mana orbs |
| 3,000 mana orbs | 4/100 | 4% | 12,000 mana orbs |
| 4,000 mana orbs | 1/100 | 1% | 4,000 mana orbs |
| 5,000 mana orbs | 1/100 | 1% | 5,000 mana orbs |
| 10 diamonds | 10/100 | 10% | 100 diamonds |
| 20 diamonds | 6/100 | 6% | 120 diamonds |
| 30 diamonds | 3/100 | 3% | 90 diamonds |
| 40 and 50 diamonds | 2/100 each | 2% each | 80 and 100 diamonds |
| 60, 70, 80, 90 and 100 diamonds | 1/100 each | 1% each | 400 diamonds combined |
| Cube | 17/100 | 17% | 17 cubes |
| Ball, wave and UFO | 3/100 each | 3% each | 3 of each |
| Ship, robot and death effect | 2/100 each | 2% each | 2 of each |
| Spider | 1/100 | 1% | 1 spider |
| Each Tier 1 shard | 2/100 | 2% | 10 of each shard |
| Each Tier 2 shard | 2/100 | 2% | 10 of each shard |
| Total | 116/100 | 116% | 116 reward occurrences |
| Reward | Chests | Share of category | Total awarded |
|---|---|---|---|
| 1,500 mana orbs | 7/60 | 11.7% | 10,500 mana orbs |
| 2,000 mana orbs | 4/60 | 6.7% | 8,000 mana orbs |
| 4,000 mana orbs | 4/60 | 6.7% | 16,000 mana orbs |
| 10 diamonds | 1/60 | 1.7% | 10 diamonds |
| 15 diamonds | 6/60 | 10% | 90 diamonds |
| 20 diamonds | 5/60 | 8.3% | 100 diamonds |
| 30 diamonds | 6/60 | 10% | 180 diamonds |
| 40 diamonds | 2/60 | 3.3% | 80 diamonds |
| 50 diamonds | 8/60 | 13.3% | 400 diamonds |
| Cube | 30/60 | 50% | 30 cubes |
| Ball and ship | 4/60 each | 6.7% each | 4 of each |
| Spider, swing and UFO | 3/60 each | 5% each | 3 of each |
| Robot and wave | 2/60 each | 3.3% each | 2 of each |
| Colour | 9/60 | 15% | 9 colours |
| Each Tier 1 shard | 2/60 | 3.3% | 10 of each shard |
| Each Tier 2 shard | 2/60 | 3.3% | 10 of each shard |
| Total | 123/60 | 205% | 123 reward occurrences |
| Reward | Chests | Share of category | Total awarded |
|---|---|---|---|
| 50 diamonds | 10/24 | 41.7% | 500 diamonds |
| 100 diamonds | 14/24 | 58.3% | 1,400 diamonds |
| Cube and UFO | 6/24 each | 25% each | 6 of each |
| Ship and swing | 3/24 each | 12.5% each | 3 of each |
| Ball, robot and wave | 2/24 each | 8.3% each | 2 of each |
| Colour | 24/24 | 100% | 24 colours |
| Each Tier 1 shard | 1/24 | 4.2% | 5 of each shard |
| Each Tier 2 shard | 1/24 | 4.2% | 5 of each shard |
| Total | 82/24 | 341.7% | 82 reward occurrences |
| Reward | Chests | Share of category | Total awarded |
|---|---|---|---|
| 100 diamonds | 12/12 | 100% | 1,200 diamonds |
| Cube | 9/12 | 75% | 9 cubes |
| Ship | 4/12 | 33.3% | 4 ships |
| UFO | 3/12 | 25% | 3 UFOs |
| Ball, wave, robot and spider | 2/12 each | 16.7% each | 2 of each |
| Colour | 12/12 | 100% | 12 colours |
| Each Tier 1 shard | 1/12 | 8.3% | 5 of each shard |
| Each Tier 2 shard | 1/12 | 8.3% | 5 of each shard |
| Additional Shadow and Lava shards | 1/12 each | 8.3% each | 10 additional shards of each |
| Total | 60/12 | 500% | 60 reward occurrences |
| Reward | Chests | Share of category | Total awarded |
|---|---|---|---|
| 500 diamonds | 8/8 | 100% | 4,000 diamonds |
| Cube | 8/8 | 100% | 8 cubes |
| Ship | 7/8 | 87.5% | 7 ships |
| Spider and UFO | 4/8 each | 50% each | 4 of each |
| Swing | 3/8 | 37.5% | 3 swings |
| Ball, robot and wave | 2/8 each | 25% each | 2 of each |
| Fire, Ice and Poison shards | 1/8 each | 12.5% each | 10 of each shard |
| Each Tier 2 shard | 1/8 | 12.5% | 10 of each shard |
| Total | 48/8 | 600% | 48 reward occurrences |
Cosmetic reward IDs
[edit | edit source]The galleries identify every cosmetic in each finite chest pool by its in-game ID. Primary and secondary colour rewards are distinguished where applicable.
Cosmetic reward IDs
Cubes
-
 Cube 97
 -
 Cube 163
 -
 Cube 167
 -
 Cube 176
 -
 Cube 179
 -
 Cube 189
 -
 Cube 245
 -
 Cube 249
 -
 Cube 255
 -
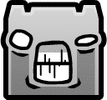 Cube 278
 -
 Cube 281
 -
 Cube 282
 -
 Cube 285
 -
 Cube 287
 -
 Cube 294
 -
 Cube 302
 -
 Cube 313
 -
 Cube 333
 -
 Cube 334
 -
 Cube 335
 -
 Cube 348
 -
 Cube 350
 -
 Cube 353
 -
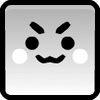 Cube 373
 -
 Cube 376
 -
 Cube 391
 -
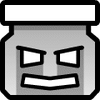 Cube 414
 -
 Cube 420
 -
 Cube 426


Ships
-
 Ship 26
 -
 Ship 69
 -
 Ship 83


Balls
-
 Ball 21

UFOs
-
 UFO 19
 -
 UFO 118


Waves
-
 Wave 16

Robots
-
 Robot 10

Spiders
-
 Spider 7

Death effects
-
 Death Effect 3

Colours
-
 Colour 41 (primary)
 -
 Colour 101 (primary)
 -
 Colour 40 (secondary)
 -
 Colour 58 (secondary)
 -
 Colour 61 (secondary)
 -
 Colour 63 (secondary)
 -
 Colour 66 (secondary)
 -
 Colour 67 (secondary)
 -
 Colour 69 (secondary)
 -
 Colour 76 (secondary)
 -
 Colour 78 (secondary)
 -
 Colour 80 (secondary)


Cubes
-
 Cube 112
 -
 Cube 114
 -
 Cube 115
 -
 Cube 116
 -
 Cube 137
 -
 Cube 155
 -
 Cube 171
 -
 Cube 175
 -
 Cube 177
 -
 Cube 180
 -
 Cube 265
 -
 Cube 269
 -
 Cube 273
 -
 Cube 289
 -
 Cube 291
 -
 Cube 322
 -
 Cube 330


Ships
-
 Ship 51
 -
 Ship 73


Balls
-
 Ball 39
 -
 Ball 42
 -
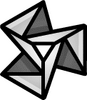 Ball 58


UFOs
-
 UFO 53
 -
 UFO 56
 -
 UFO 97


Waves
-
 Wave 34
 -
 Wave 42
 -
 Wave 76


Robots
-
 Robot 26
 -
 Robot 30


Spiders
-
 Spider 17

Death effects
-
 Death Effect 14
 -
 Death Effect 15


Cubes
-
 Cube 212
 -
 Cube 218
 -
 Cube 228
 -
 Cube 256
 -
 Cube 259
 -
 Cube 298
 -
 Cube 300
 -
 Cube 318
 -
 Cube 328
 -
 Cube 331
 -
 Cube 336
 -
 Cube 338
 -
 Cube 340
 -
 Cube 345
 -
 Cube 349
 -
 Cube 355
 -
 Cube 366
 -
 Cube 374
 -
 Cube 380
 -
 Cube 382
 -
 Cube 389
 -
 Cube 392
 -
 Cube 398
 -
 Cube 402
 -
 Cube 410
 -
 Cube 418
 -
 Cube 432
 -
 Cube 437
 -
 Cube 441
 -
 Cube 461


Ships
-
 Ship 64
 -
 Ship 71
 -
 Ship 89
 -
 Ship 110


Balls
-
 Ball 85
 -
 Ball 87
 -
 Ball 101
 -
 Ball 109


UFOs
-
 UFO 81
 -
 UFO 103
 -
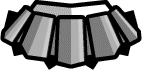 UFO 123


Waves
-
 Wave 54
 -
 Wave 91


Robots
-
 Robot 27
 -
 Robot 61


Spiders
-
 Spider 34
 -
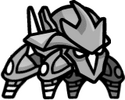 Spider 52
 -
 Spider 63


Swings
-
 Swing 14
 -
 Swing 28
 -
 Swing 29


Colours
-
 Colour 64 (secondary)
 -
 Colour 75 (secondary)
 -
 Colour 81 (secondary)
 -
 Colour 82 (secondary)
 -
 Colour 83 (secondary)
 -
 Colour 84 (secondary)
 -
Colour 101 (secondary)
-
 Colour 103 (secondary)
 -
 Colour 105 (secondary)


Cubes
-
 Cube 293
 -
 Cube 295
 -
 Cube 404
 -
 Cube 405
 -
 Cube 406
 -
 Cube 419


Ships
-
 Ship 59
 -
 Ship 72
 -
 Ship 112


Balls
-
 Ball 88
 -
 Ball 89


UFOs
-
 UFO 39
 -
 UFO 58
 -
 UFO 61
 -
 UFO 67
 -
 UFO 99
 -
 UFO 126


Waves
-
 Wave 47
 -
 Wave 73


Robots
-
 Robot 64
 -
 Robot 67


Swings
-
 Swing 11
 -
 Swing 13
 -
 Swing 43


Colours
-
 Colour 42 (primary)
 -
 Colour 43 (primary)
 -
 Colour 46 (primary)
 -
 Colour 47 (primary)
 -
 Colour 50 (primary)
 -
 Colour 55 (primary)
 -
Colour 66 (primary)
-
Colour 67 (primary)
-
 Colour 68 (primary)
 -
Colour 69 (primary)
-
 Colour 70 (primary)
 -
 Colour 72 (primary)
 -
 Colour 73 (primary)
 -
Colour 75 (primary)
-
Colour 78 (primary)
-
 Colour 79 (primary)
 -
Colour 81 (primary)
-
 Colour 87 (primary)
 -
 Colour 88 (primary)
 -
 Colour 90 (primary)
 -
Colour 42 (secondary)
-
 Colour 60 (secondary)
 -
 Colour 74 (secondary)
 -
 Colour 98 (secondary)


Cubes
-
 Cube 166
 -
 Cube 202
 -
 Cube 261
 -
 Cube 264
 -
 Cube 280
 -
 Cube 301
 -
 Cube 361
 -
 Cube 384
 -
 Cube 393


Ships
-
 Ship 82
 -
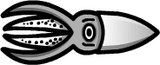 Ship 85
 -
 Ship 97
 -
 Ship 135


Balls
-
 Ball 56
 -
 Ball 115


UFOs
-
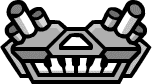 UFO 87
 -
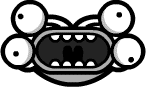 UFO 142
 -
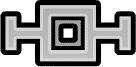 UFO 143


Waves
-
 Wave 79
 -
 Wave 96


Robots
-
 Robot 36
 -
 Robot 50


Spiders
-
 Spider 47
 -
 Spider 62


Colours
-
 Colour 44 (secondary)
 -
 Colour 45 (secondary)
 -
Colour 46 (secondary)
-
 Colour 48 (secondary)
 -
Colour 50 (secondary)
-
Colour 55 (secondary)
-
Colour 87 (secondary)
-
Colour 90 (secondary)
-
 Colour 92 (secondary)
 -
 Colour 93 (secondary)
 -
 Colour 95 (secondary)
 -
 Colour 97 (secondary)


Cubes
-
 Cube 192
 -
 Cube 204
 -
 Cube 317
 -
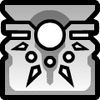 Cube 323
 -
 Cube 356
 -
 Cube 367
 -
 Cube 383
 -
 Cube 386


Ships
-
 Ship 55
 -
 Ship 116
 -
 Ship 132
 -
 Ship 136
 -
 Ship 138
 -
 Ship 160
 -
 Ship 169


Balls
-
 Ball 69
 -
 Ball 84


UFOs
-
 UFO 42
 -
 UFO 77
 -
 UFO 94
 -
 UFO 106


Waves
-
 Wave 57
 -
 Wave 71


Robots
-
 Robot 44
 -
 Robot 59


Spiders
-
 Spider 41
 -
 Spider 48
 -
 Spider 59
 -
 Spider 61


Swings
-
 Swing 4
 -
 Swing 20
 -
 Swing 35


Cubes
-
 Cube 157
 -
 Cube 170
 -
 Cube 183
 -
 Cube 258
 -
 Cube 357
 -
 Cube 283


Ships
-
 Ship 133
 -
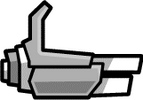 Ship 165
 -
 Ship 139
 -
 Ship 147


Balls
-
 Ball 100
 -
 Ball 74


UFOs
-
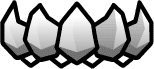 UFO 43
 -
 UFO 66


Waves
-
 Wave 95
 -
 Wave 88


Spiders
-
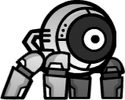 Spider 33
 -
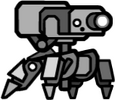 Spider 31


Swings
-
 Swing 5
 -
 Swing 24


History
[edit | edit source]Update 2.1 introduced the Treasure Room with 200 one-key chests and 48 five-key chests, arranged in grids of twelve. Opening all 248 chests cost 440 Demon Keys.
Update 2.2 redesigned the room, increased the one-key and five-key collections to 400 and 100 chests respectively, and introduced chest categories costing 10, 25, 50 and 100 Demon Keys. This brought the regular-chest total to 604 and the total cost to 3,500 Demon Keys. The update also added entrances to the Mechanic and Diamond Shop. Update 2.207 introduced Event Levels and their reward chests, providing Gold Keys used by the room's Gold Chests.
Trivia
[edit | edit source]- The music played in the Treasure Room is Random Song 01, produced by RobTop. It is also used in the Vault.
- The Keymaster sprite in the insufficient-keys dialogue becomes progressively more shocked for higher-cost chests.
- If all 3,500 Demon Keys are obtained solely through eligible mana-orb progress, they correspond to 1,750,000 mana orbs. Keys awarded directly by chests or Event Levels reduce the required number of mana orbs.
General messages
When trying to open a silver chest without a Demon Key:
- The Keymaster: You need a key to open this chest.
When trying to open a larger chest with an insufficient number of Demon Keys:
- The Keymaster: You need <number> more keys to open this chest
When trying to open a bonus chest before meeting its requirement:
- The Keymaster: Unlock # more Chest(s), and you can collect this bonus.
When trying to open a Gold Chest without a Gold Key:
- The Keymaster: You need a Gold Key to unlock this chest.
When trying to open a Gold Chest after all 20 have been opened:
- All out of Gold Chests right now. Come back later.
Introductory dialogue
When trying to access the Treasure Room with an insufficient number of keys:
- The Keymaster: Bring me 5 keys, and I will let you pass.
- The Keymaster: Collect 4-1 more key(s), and I will let you pass.
After trying to access the Treasure Room with at least five keys:
- The Keymaster: Well, well, well. Look who it is.
- I see you have the keys. But what comes next?
- The door is open. Time to find out...
Gallery
[edit | edit source]-
 The first set of Treasure Room chests
 -
 Another Treasure Room screen
 -
 A Treasure Room chest screen
 -
 The shop entrances
 -
 Chest requiring 1 Demon Key
 -
 Chest requiring 5 Demon Keys
 -
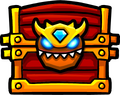 Chest requiring 10 Demon Keys
 -
 Chest requiring 25 Demon Keys
 -
 Chest requiring 50 Demon Keys
 -
 Chest requiring 100 Demon Keys
 -
 Bonus chest requiring other chests to be opened
 -
 Chest requiring 1 Gold Key


