
| Item | Probability | Percentage | Total Reward | |
|---|---|---|---|---|
| Orb (100) | 50/400 | 12.5 % | 5000 Orbs | |
| Diamond (10) | 48/400 | 12 % | 480 Diamonds | |
| Orb (200) | 44/400 | 11 % | 8800 Orbs | |
| Orb (50) | 41/400 | 10.25 % | 2050 Orbs | |
| Diamond (5) | 33/400 | 8.25 % | 165 Diamonds | |
| Cube Icon | 30/400 | 7.5 % | 30 Cube | |
| Diamond (20) | 26/400 | 6.5 % | 520 Diamond | |
| Colour | 12/400 | 3 % | 12 Colour | |
| Orb (500) | 12/400 | 3 % | 6000 Orbs | |
| Tier 1 Shards | Fire (1) | 10/400 | 2.5 % | 10 of each |
| Ice (1) | 10/400 | 2.5 % | ||
| Poison (1) | 10/400 | 2.5 % | ||
| Shadow (1) | 10/400 | 2.5 % | ||
| Lava (1) | 10/400 | 2.5 % | ||
| Orb (300) | 8/400 | 2 % | 2400 Orbs | |
| Tier 2 Shards | Earth (1) | 6/400 | 1.5 % | 6 of each |
| Blood (1) | 6/400 | 1.5 % | ||
| Metal (1) | 6/400 | 1.5 % | ||
| Light (1) | 6/400 | 1.5 % | ||
| Soul (1) | 6/400 | 1.5 % | ||
| Diamond (30) | 4/400 | 1 % | 120 Diamonds | |
| Tier 1 Shards | Fire (2) | 3/400 | 0.75 % | 6 of each |
| Ice (2) | 3/400 | 0.75 % | ||
| Poison (2) | 3/400 | 0.75 % | ||
| Shadow (2) | 3/400 | 0.75 % | ||
| Lava (2) | 3/400 | 0.75 % | ||
| Tier 2 Shards | Earth (2) | 3/400 | 0.75 % | 6 of each |
| Blood (2) | 3/400 | 0.75 % | ||
| Metal (2) | 3/400 | 0.75 % | ||
| Light (2) | 3/400 | 0.75 % | ||
| Soul (2) | 3/400 | 0.75 % | ||
| Ship Icon | 3/400 | 0.75 % | 3 Ship | |
| Diamond (50) | 2/400 | 0.5 % | 1000 Diamonds | |
| Orb (1000) | 2/400 | 0.5 % | 2000 Orbs | |
| UFO Icon | 2/400 | 0.5 % | 2 UFO | |
| Tier 1 Shards | Fire (3) | 1/400 | 0.25 % | 3 of each |
| Ice (3) | 1/400 | 0.25 % | ||
| Poison (3) | 1/400 | 0.25 % | ||
| Shadow (3) | 1/400 | 0.25 % | ||
| Lava (3) | 1/400 | 0.25 % | ||
| Tier 2 Shards | Earth (3) | 1/400 | 0.25 % | 3 of each |
| Blood (3) | 1/400 | 0.25 % | ||
| Metal (3) | 1/400 | 0.25 % | ||
| Light (3) | 1/400 | 0.25 % | ||
| Soul (3) | 1/400 | 0.25 % | ||
| Ball Icon | 1/400 | 0.25 % | 1 Ball | |
| Wave Icon | 1/400 | 0.25 % | 1 Wave | |
| Robot Icon | 1/400 | 0.25 % | 1 Robot | |
| Spider Icon | 1/400 | 0.25 % | 1 Spider | |
| Death Effect | 1/400 | 0.25 % | 1 Death Effect | |
| Total | 437/400 | 109.25 % | 737 Loots | |
Treasure Room: Difference between revisions
Jump to navigation
Jump to search
geometrydash.wiki.gg>HexhammerGD m Hope this isn't uncouth but the images stretching into the Rewards makes some pages unintelligible. Made several minor adjustments to stop this. (I also can't check if what I did is even working lol) |
geometrydash.wiki.gg>HexhammerGD m Forgot one period. Also made some sections clearer, hopefully not unnecessarily? Up to y'all. I haven't edited in 7 years! |
||
| Line 9: | Line 9: | ||
==Description== | ==Description== | ||
The first screen contains 3 different chest textures, each leading to a subsection of one type of chest. the first one leads to a room with 400 chests costing one demon key each. the second one leads to a room of 100 chests costing 5 demon keys each. the third one leads to a room with 60 chests costing 10 demon keys each. These chests contain a variety of rewards, including orbs, diamonds, shards, icons and colors. Some chests contain a mix of these rewards, with 10 key chests guaranteeing an icon or a color. | The first screen contains 3 different chest textures, each leading to a subsection of one type of chest. the first one leads to a room with 400 chests costing one demon key each. the second one leads to a room of 100 chests costing 5 demon keys each. the third one leads to a room with 60 chests costing 10 demon keys each. These chests contain a variety of rewards, including orbs, diamonds, shards, icons and colors. Some chests contain a mix of these rewards, with 10 key chests guaranteeing a combination containing an icon or a color. | ||
The second screen is titled "Tier 2" and, much like the first one, has three different chest textures each leading to a subsection. The first chest leads to a subsection of 24 chests costing 25 demon keys each. The second chest leads to a subsection of 12 chests costing 50 demon keys each. The final chest contains 8 chests costing 100 demon keys each. All of these chests contain one or more icons or colors, alongside other types of rewards | The second screen is titled "Tier 2" and, much like the first one, has three different chest textures each leading to a subsection. The first chest leads to a subsection of 24 chests costing 25 demon keys each. The second chest leads to a subsection of 12 chests costing 50 demon keys each. The final chest contains 8 chests costing 100 demon keys each. All of these chests contain one or more icons or colors, alongside other types of rewards, often multiple types of rewards (such as orbs ''and'' diamonds in one chest.) | ||
The third screen contains three large chests which are unlocked once enough chests have been opened. They each contain icons, with the first large chest also contains the green key needed to remove the green lock in the [[Basement]]. | The third screen contains three large chests which are unlocked once enough chests have been opened. They each contain icons, with the first large chest also contains the green key needed to remove the green lock in the [[Basement]]. | ||
Revision as of 14:54, 10 November 2024


The Treasure Room is a room in Geometry Dash and Geometry Dash World, being introduced in Update 2.1. It is located through a door in the lower right corner of the creator menu, requiring 5 demon keys to gain access.
Description
The first screen contains 3 different chest textures, each leading to a subsection of one type of chest. the first one leads to a room with 400 chests costing one demon key each. the second one leads to a room of 100 chests costing 5 demon keys each. the third one leads to a room with 60 chests costing 10 demon keys each. These chests contain a variety of rewards, including orbs, diamonds, shards, icons and colors. Some chests contain a mix of these rewards, with 10 key chests guaranteeing a combination containing an icon or a color.
The second screen is titled "Tier 2" and, much like the first one, has three different chest textures each leading to a subsection. The first chest leads to a subsection of 24 chests costing 25 demon keys each. The second chest leads to a subsection of 12 chests costing 50 demon keys each. The final chest contains 8 chests costing 100 demon keys each. All of these chests contain one or more icons or colors, alongside other types of rewards, often multiple types of rewards (such as orbs and diamonds in one chest.)
The third screen contains three large chests which are unlocked once enough chests have been opened. They each contain icons, with the first large chest also contains the green key needed to remove the green lock in the Basement.
- First large chest: 50 chests
- Second large chest: 100 chests
- Third large chest: 200 chests
The fourth screen contains a set of twenty gold chests which require one gold key each to be unlocked. There is no subsection; clicking on the gold chest while you have a gold key results in one unlocking immediately.
The last screen contains four ropes, each leading to the different unlockable shops, with access locked until you reach a certain number of Diamonds. In the order that their ropes are placed in the room, they are:
- Secret Shop, unlocked with 500 Diamonds
- Community Shop, unlocked with 200 Diamonds
- The Mechanic, unlocked with 2,000 Diamonds
- Diamond Shop, unlocked with 1,000 Diamonds
Loot chances
The distribution of chests is as follows (the percentages for each section may add up to over 100% because sometimes you can get multiple rewards from the same chest) (information also may not be 100% accurate but should be):
Average of 1,0925 loot / chest
Average of 1.16 loot / chest
Average of 2.2 loot / chest
Average of 3.4 loot / Chest
Average of 5 loot / Chest
Average of 2 loot / chest
Average of 1 loot chest
Average of 1 loot chest
| Item | Probability | Percentage | Total Reward | |
|---|---|---|---|---|
| Cube Icon | 17/100 | 17 % | 17 Cube | |
| Orb (1000) | 11/100 | 11 % | 11000 Orbs | |
| Diamond (10) | 10/100 | 10 % | 100 Diamonds | |
| Orb (2000) | 9/100 | 9 % | 18000 Orbs | |
| Diamond (20) | 6/100 | 6 % | 120 Diamonds | |
| Orb (500) | 5/100 | 5 % | 2500 Orbs | |
| Orb (3000) | 4/100 | 4 % | 12000 Orbs | |
| Ball Icon | 3/100 | 3 % | 3 Ball | |
| Wave Icon | 3/100 | 3 % | 3 Wave | |
| UFO Icon | 3/100 | 3 % | 3 UFO | |
| Diamond (30) | 3/100 | 3 % | 90 Diamonds | |
| Orb (1500) | 2/100 | 2 % | 3000 Orbs | |
| Orb (2500) | 2/100 | 2 % | 5000 Orbs | |
| Tier 1 Shards | Fire (5) | 2/100 | 2 % | 10 of each |
| Ice (5) | 2/100 | 2 % | ||
| Poison (5) | 2/100 | 2 % | ||
| Shadow (5) | 2/100 | 2 % | ||
| Lava (5) | 2/100 | 2 % | ||
| Tier 2 Shards | Earth (5) | 2/100 | 2 % | 10 of each |
| Blood (5) | 2/100 | 2 % | ||
| Metal (5) | 2/100 | 2 % | ||
| Light (5) | 2/100 | 2 % | ||
| Soul (5) | 2/100 | 2 % | ||
| Diamond (40) | 2/100 | 2 % | 80 Diamonds | |
| Diamond (50) | 2/100 | 2 % | 100 Diamonds | |
| Ship Icon | 2/100 | 2 % | 2 Ship | |
| Robot Icon | 2/100 | 2 % | 2 Robot | |
| Death Effect | 2/100 | 2 % | 2 Death Effect | |
| Orb (4000) | 1/100 | 1 % | 4000 Orbs | |
| Orb (5000) | 1/100 | 1 % | 5000 Orbs | |
| Diamond (60) | 1/100 | 1 % | 60 Diamonds | |
| Diamond (70) | 1/100 | 1 % | 70 Diamonds | |
| Diamond (80) | 1/100 | 1 % | 80 Diamonds | |
| Diamond (90) | 1/100 | 1 % | 90 Diamonds | |
| Diamond (100) | 1/100 | 1 % | 100 Diamonds | |
| Spider Icon | 1/100 | 1 % | 1 Spider | |
| Total | 116/100 | 116 % | 116 Loot | |
| Item | Probability | Percentage | Total Reward | |
|---|---|---|---|---|
| Cube Icon | 30/60 | 50 % | 30 Cube | |
| Colour | 9/60 | 15 % | 9 Colour | |
| Diamond (50) | 8/60 | 13.3 % | 400 Diamonds | |
| Orb (1500) | 7/60 | 11.7 % | 10500 Orbs | |
| Diamond (15) | 6/60 | 10 % | 90 Diamonds | |
| Diamond (30) | 6/60 | 10 % | 180 Diamonds | |
| Diamond (20) | 5/60 | 8.3 % | 100 Diamonds | |
| Orb (2000) | 4/60 | 6.7 % | 8000 Orbs | |
| Orb (4000) | 4/60 | 6.7 % | 16000 Orbs | |
| Ball Icon | 4/60 | 6.7 % | 4 Ball | |
| Ship Icon | 4/60 | 6.7 % | 4 Ship | |
| Spider Icon | 3/60 | 5 % | 3 Spider | |
| Swing Icon | 3/60 | 5 % | 3 Swing | |
| UFO Icon | 3/60 | 5 % | 3 UFO | |
| Diamonds (40) | 2/60 | 3.3 % | 80 Diamonds | |
| Tier 1 Shards | Fire (5) | 2/60 | 3.3 % | 10 of each |
| Ice (5) | 2/60 | 3.3 % | ||
| Poison (5) | 2/60 | 3.3 % | ||
| Shadow (5) | 2/60 | 3.3 % | ||
| Lava (5) | 2/60 | 3.3 % | ||
| Tier 2 Shards | Earth (5) | 2/60 | 3.3 % | 10 of each |
| Blood (5) | 2/60 | 3.3 % | ||
| Metal (5) | 2/60 | 3.3 % | ||
| Light (5) | 2/60 | 3.3 % | ||
| Soul (5) | 2/60 | 3.3 % | ||
| Robot Icon | 2/60 | 3.3 % | 2 Robot | |
| Wave Icon | 2/60 | 3.3 % | 2 Wave | |
| Diamond (10) | 1/60 | 1.7 % | 10 Diamonds | |
| Total | 132/60 | 200 % | 132 Loot | |
| Item | Probability | Percentage | Total Reward | |
|---|---|---|---|---|
| Colour | 24/24 | 100 % | 24 Colors | |
| Diamond (100) | 14/24 | 58.3 % | 1400 diamonds | |
| Diamond (50) | 10/24 | 41.7 % | 500 diamonds | |
| Cube Icon | 6/24 | 25 % | 6 Cube | |
| UFO Icon | 6/24 | 25 % | 6 Ufo | |
| Ship Icon | 3/24 | 12.5 % | 3 Ship | |
| Swing Icon | 3/24 | 12.5 % | 3 Swing | |
| Ball Icon | 2/24 | 8.3 % | 2 Ball | |
| Robot Icon | 2/24 | 8.3 % | 2 Robot | |
| Wave Icon | 2/24 | 8.3 % | 2 Wave | |
| Tier 1 Shards | Fire (5) | 1/24 | 4.2 % | 5 of each |
| Ice (5) | 1/24 | 4.2 % | ||
| Poison (5) | 1/24 | 4.2 % | ||
| Shadow (5) | 1/24 | 4.2 % | ||
| Lava (5) | 1/24 | 4.2 % | ||
| Tier 2 Shards | Earth (5) | 1/24 | 4.2 % | 5 of each |
| Blood (5) | 1/24 | 4.2 % | ||
| Metal (5) | 1/24 | 4.2 % | ||
| Light (5) | 1/24 | 4.2 % | ||
| Soul (5) | 1/24 | 4.2 % | ||
| Total | 82/24 | 362.5 % | 82 loots | |
| Item | Probability | Percentage | Total Reward | |
|---|---|---|---|---|
| Colour | 12/12 | 100 % | 12 Colour | |
| Diamond (100) | 12/12 | 100 % | 1200 Diamonds | |
| Cube Icon | 9/12 | 75 % | 9 Cube | |
| Ship Icon | 4/12 | 33.3 % | 4 Ship | |
| UFO Icon | 3/12 | 25 % | 3 UFO | |
| Ball Icon | 2/12 | 16.7 % | 2 Ball | |
| Wave Icon | 2/12 | 16.7 % | 2 Wave | |
| Robot Icon | 2/12 | 16.7 % | 2 Robot | |
| Spider Icon | 2/12 | 16.7 % | 2 Spider | |
| Tier 1 Shards | Fire (5) | 1/12 | 8.3 % | 5 of each |
| Ice (5) | 1/12 | 8.3 % | ||
| Poison (5) | 1/12 | 8.3 % | ||
| Shadow (5) | 1/12 | 8.3 % | ||
| Lava (5) | 1/12 | 8.3 % | ||
| Tier 2 Shards | Earth (5) | 1/12 | 8.3 % | 5 of each |
| Blood (5) | 1/12 | 8.3 % | ||
| Metal (5) | 1/12 | 8.3 % | ||
| Light (5) | 1/12 | 8.3 % | ||
| Soul (5) | 1/12 | 8.3 % | ||
| Tier 1 Shards | Shadow (10) | 1/12 | 8.3 % | 10 of each |
| Lava (10) | 1/12 | 8.3 % | ||
| Total | 60/12 | 500 % | 60 Loot | |
| Item | Probability | Percentage | Total Reward | |
|---|---|---|---|---|
| Cube Icon | 8/8 | 100 % | 8 Cube | |
| Diamond (500) | 8/8 | 100 % | 4000 Diamonds | |
| Ship Icon | 7/8 | 87.5 % | 7 Ship | |
| Spider Icon | 4/8 | 50 % | 4 Spider | |
| UFO Icon | 4/8 | 50 % | 4 UFO | |
| Swing Icon | 3/8 | 37.5 % | 3 Swing | |
| Ball Icon | 2/8 | 25 % | 2 Ball | |
| Robot Icon | 2/8 | 25 % | 2 Robot | |
| Wave Icon | 2/8 | 25 % | 2 Wave | |
| Tier 1 Shards | Fire (10) | 1/8 | 12.5 % | 10 of each |
| Ice (10) | 1/8 | 12.5 % | ||
| Poison (10) | 1/8 | 12.5 % | ||
| Tier 2 Shards | Earth (10) | 1/8 | 12.5 % | 10 of each |
| Blood (10) | 1/8 | 12.5 % | ||
| Metal (10) | 1/8 | 12.5 % | ||
| Light (10) | 1/8 | 12.5 % | ||
| Soul (10) | 1/8 | 12.5 % | ||
| Total | 48/8 | 600 % | 48 Loot | |
| Item | Probability | Percentage | Total Loot |
|---|---|---|---|
| Ball Icon | 1/1 | 100 % | 1 Ball |
| Green Key | 1/1 | 100 % | 1 Green Key |
| Item | Probability | Percentage | Total Loot |
|---|---|---|---|
| Cube Icon | 1/1 | 100 % | 1 Cube |
| Item | Probability | Percentage | Total Loot |
|---|---|---|---|
| UFO Icon | 1/1 | 100 % | 1 UFO |
TBA
Rewards
-

-

-

-

-
-

-
-

-
-

-

-
-

-
-

-

-

-

-

-

-

-
-
-
-

-

-
-

-

-

-

-

-

-

-

-

-

-

-

-
![[primary]](/images/8/83/Colour041.png) [primary]
[primary] -
![[primary]](/images/thumb/8/85/Colour101.png/120px-Colour101.png) [primary]
[primary] -
![[secondary]](/images/a/a8/Colour040.png) [secondary]
[secondary] -
![[secondary]](/images/thumb/5/58/Colour055.png/120px-Colour055.png) [secondary]
[secondary] -
![[secondary]](/images/thumb/5/56/Colour061.png/120px-Colour061.png) [secondary]
[secondary] -
![[secondary]](/images/8/8f/Colour063.png) [secondary]
[secondary] -
![[secondary]](/images/thumb/f/fc/Colour066.png/120px-Colour066.png) [secondary]
[secondary] -
![[secondary]](/images/thumb/e/e7/Colour067.png/120px-Colour067.png) [secondary]
[secondary] -
![[secondary]](/images/thumb/9/9c/Colour069.png/120px-Colour069.png) [secondary]
[secondary] -
![[secondary]](/images/e/ec/Colour076.png) [secondary]
[secondary] -
![[secondary]](/images/c/cb/Colour078.png) [secondary]
[secondary] -
![[secondary]](/images/thumb/f/f5/Colour080.png/120px-Colour080.png) [secondary]
[secondary] -
 26250
26250 -
 2 285
2 285 -
 19
19 -
 19
19 -
 19
19 -
 19
19 -
 19
19 -
 15
15 -
 15
15 -
 15
15 -
 15
15 -
 15
15


![[primary]](/wiki/File:Colour041.png)
![[primary]](/wiki/File:Colour101.png)
![[secondary]](/wiki/File:Colour040.png)
![[secondary]](/wiki/File:Colour055.png)
![[secondary]](/wiki/File:Colour061.png)
![[secondary]](/wiki/File:Colour063.png)
![[secondary]](/wiki/File:Colour066.png)
![[secondary]](/wiki/File:Colour067.png)
![[secondary]](/wiki/File:Colour069.png)
![[secondary]](/wiki/File:Colour076.png)
![[secondary]](/wiki/File:Colour078.png)
![[secondary]](/wiki/File:Colour080.png)


-

-
-

-

-

-

-
-
-

-
-

-

-

-

-

-

-

-

-

-

-

-

-

-

-

-
-

-

-

-

-

-

-

-
60500
-
890
-
10
-
10
-
10
-
10
-
10
-
10
-
10
-
10
-
10
-
10


-
-

-

-

-

-

-

-

-

-
-

-

-

-

-

-

-

-

-

-

-

-

-

-

-
-
-

-

-
-

-

-

-

-

-

-

-

-

-

-

-

-

-

-

-

-

-

-

-

-

-

-
![[secondary]](/images/thumb/c/c5/Colour064.png/120px-Colour064.png) [secondary]
[secondary] -
![[secondary]](/images/b/bb/Colour075.png) [secondary]
[secondary] -
![[secondary]](/images/thumb/b/b3/Colour081.png/120px-Colour081.png) [secondary]
[secondary] -
![[secondary]](/images/thumb/3/3a/Colour082.png/120px-Colour082.png) [secondary]
[secondary] -
![[secondary]](/images/thumb/9/9e/Colour083.png/120px-Colour083.png) [secondary]
[secondary] -
![[secondary]](/images/7/77/Colour084.png) [secondary]
[secondary] -
[secondary]
-
![[secondary]](/images/thumb/5/59/Colour103.png/120px-Colour103.png) [secondary]
[secondary] -
![[secondary]](/images/f/f3/Colour105.png) [secondary]
[secondary] -
57500
-
860
-
10
-
10
-
10
-
10
-
10
-
10
-
10
-
10
-
10
-
10


![[secondary]](/wiki/File:Colour064.png)
![[secondary]](/wiki/File:Colour075.png)
![[secondary]](/wiki/File:Colour081.png)
![[secondary]](/wiki/File:Colour082.png)
![[secondary]](/wiki/File:Colour083.png)
![[secondary]](/wiki/File:Colour084.png)
![[secondary]](/wiki/File:Colour103.png)
![[secondary]](/wiki/File:Colour105.png)
-

-
-

-

-

-

-

-

-

-

-

-

-

-

-

-

-

-

-

-

-

-

-

-

-
![[primary]](/images/f/f4/Colour042.png) [primary]
[primary] -
![[primary]](/images/0/08/Colour043.png) [primary]
[primary] -
![[primary]](/images/6/60/Colour046.png) [primary]
[primary] -
![[primary]](/images/5/54/Colour047.png) [primary]
[primary] -
![[primary]](/images/thumb/5/5d/Colour050.png/120px-Colour050.png) [primary]
[primary] -
[primary]
-
[primary]
-
[primary]
-
![[primary]](/images/thumb/4/4f/Colour068.png/120px-Colour068.png) [primary]
[primary] -
[primary]
-
![[primary]](/images/8/83/Colour070.png) [primary]
[primary] -
![[primary]](/images/thumb/7/70/Colour072.png/120px-Colour072.png) [primary]
[primary] -
![[primary]](/images/thumb/7/7e/Colour073.png/120px-Colour073.png) [primary]
[primary] -
[primary]
-
[primary]
-
![[primary]](/images/thumb/d/d3/Colour079.png/120px-Colour079.png) [primary]
[primary] -
[primary]
-
![[primary]](/images/thumb/f/fa/Colour087.png/120px-Colour087.png) [primary]
[primary] -
![[primary]](/images/1/12/Colour088.png) [primary]
[primary] -
![[primary]](/images/thumb/c/c5/Colour090.png/120px-Colour090.png) [primary]
[primary] -
[secondary]
-
![[secondary]](/images/thumb/2/22/Colour060.png/120px-Colour060.png) [secondary]
[secondary] -
![[secondary]](/images/thumb/0/0f/Colour074.png/120px-Colour074.png) [secondary]
[secondary] -
![[secondary]](/images/thumb/2/2d/Colour098.png/120px-Colour098.png) [secondary]
[secondary] -
1900
-
5
-
5
-
5
-
5
-
5
-
5
-
5
-
5
-
5
-
5


![[primary]](/wiki/File:Colour042.png)
![[primary]](/wiki/File:Colour043.png)
![[primary]](/wiki/File:Colour046.png)
![[primary]](/wiki/File:Colour047.png)
![[primary]](/wiki/File:Colour050.png)
![[primary]](/wiki/File:Colour068.png)
![[primary]](/wiki/File:Colour070.png)
![[primary]](/wiki/File:Colour072.png)
![[primary]](/wiki/File:Colour073.png)
![[primary]](/wiki/File:Colour079.png)
![[primary]](/wiki/File:Colour087.png)
![[primary]](/wiki/File:Colour088.png)
![[primary]](/wiki/File:Colour090.png)
![[secondary]](/wiki/File:Colour060.png)
![[secondary]](/wiki/File:Colour074.png)
![[secondary]](/wiki/File:Colour098.png)
-

-

-
-

-

-
-

-

-

-

-

-

-

-

-

-

-

-

-

-

-

-

-

-

-
![[secondary]](/images/f/f5/Colour044.png) [secondary]
[secondary] -
![[secondary]](/images/b/b1/Colour045.png) [secondary]
[secondary] -
[secondary]
-
![[secondary]](/images/thumb/6/6e/Colour048.png/120px-Colour048.png) [secondary]
[secondary] -
[secondary]
-
[secondary]
-
[secondary]
-
[secondary]
-
![[secondary]](/images/thumb/7/76/Colour092.png/120px-Colour092.png) [secondary]
[secondary] -
![[secondary]](/images/thumb/4/41/Colour093.png/120px-Colour093.png) [secondary]
[secondary] -
![[secondary]](/images/thumb/f/f2/Colour095.png/120px-Colour095.png) [secondary]
[secondary] -
![[secondary]](/images/f/fd/Colour097.png) [secondary]
[secondary] -
1200
-
5
-
5
-
5
-
15
-
15
-
5
-
5
-
5
-
5
-
5


![[secondary]](/wiki/File:Colour044.png)
![[secondary]](/wiki/File:Colour045.png)
![[secondary]](/wiki/File:Colour048.png)
![[secondary]](/wiki/File:Colour092.png)
![[secondary]](/wiki/File:Colour093.png)
![[secondary]](/wiki/File:Colour095.png)
![[secondary]](/wiki/File:Colour097.png)
-
-

-

-
-

-

-

-

-

-

-

-

-

-

-

-

-

-

-

-

-

-

-

-

-

-

-

-
-

-

-

-

-
4000
-
10
-
10
-
10
-
10
-
10
-
10
-
10
-
10


TBA
-
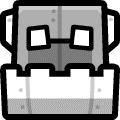
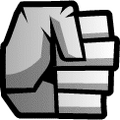
 Large chest requiring 50 chests opened
 -
 Large chest requiring 50 chests opened
 -
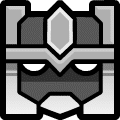
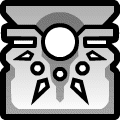
 Large chest requiring 100 chests opened
 -
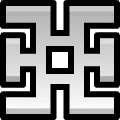
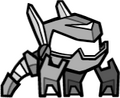
 Large chest requiring 200 chests opened


Trivia
- Prior to Update 2.2, there were only 1-key and 5-key chests, which were individually displayed in 4x3 arrays across numerous screens.
- Also prior to Update 2.2, 440 keys were required to open all chests. In the aforementioned update, this number has been increased to 3500 keys.
- This requires you to collect a total of 1,750,000 orbs (as one key is obtained every 500), which is more than enough to unlock all paths and buy all icons in all shops except the Diamond Shop.
- The music that plays in the Treasure Room is Random Song 01 and was produced by Robert Topala. It is also used in the Vault.
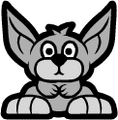
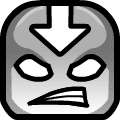
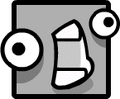
- The sprite used for the Keymaster in the "insufficient keys" dialog box changes based on how many keys the chest requires, him getting more/less shocked the more/less keys required.
General messages
When trying to open a silver chest without a key:
- The Keymaster: You need a key to open this chest.
When trying to open a larger chest with an insufficient number of keys:
- The Keymaster: You need <number> more key(s) to open this chest.
When trying to open a large chest with an insufficient number of chests opened:
- The Keymaster: Unlock # more Chest(s), and you can collect this bonus.
Introductory dialogue
When trying to access the Treasure Room with an insufficient number of keys:
- The Keymaster: Bring me 5 keys, and I will let you pass.
- The Keymaster: Collect 4-1 more key(s), and I will let you pass.
After trying to access the Treasure Room with at least 5 keys:
- The Keymaster: Well, well, well. Look who it is.
- I see you have the keys. But what comes next?
- The door is open. Time to find out...
Gallery
-
 Chest requiring 1 demon key
 -
 Chest requiring 5 demon keys
 -
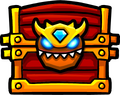 Chest requiring 10 demon keys
 -
 Chest requiring 25 demon keys
 -
 Chest requiring 50 demon keys
 -
 Chest requiring 100 demon keys
 -
 Chest requiring other chests to be opened
 -
 Chest requiring 1 gold key


