


-
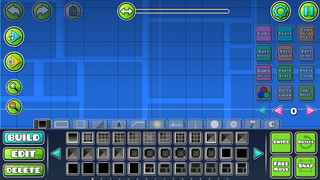 Build toolbar
 -
 Edit toolbar
 -
 Delete toolbar
Level Editor: Difference between revisions
Jump to navigation
Jump to search
m 25 revisions imported: Copied from Official Wiki https://geometrydash.wiki.gg/index.php?title=Level+Editor&oldid=256399 ; contributors: https://geometrydash.wiki.gg/index.php?title=Level+Editor&action=history |
Standardize prose spelling to Canadian English; preserve names, quotations and wiki syntax |
||
| (33 intermediate revisions by the same user not shown) | |||
| Line 1: | Line 1: | ||
{{WIP}} | |||
[[File:LevelEditorMenu.png|right|270px]]{{#setmainimage:LevelEditorMenu.png|quiet}} | |||
The '''Level Editor''' is a feature in [[Geometry Dash]] which allows players to create their own [[User Levels|user levels]] and share them online for others to play. It is only available in the full version of Geometry Dash. | |||
*'''[[:File:GDEditor-v2.2.pdf|v2.2 Level Editor Guide]]''' (current) | |||
*'''[[:File:GDEditor-v2.1.pdf|v2.1 Level Editor Guide]]''' | |||
[[ | ==Description== | ||
===Title=== | |||
The title of a level signifies its name, having a character limit of 20 characters. Spaces also count as characters when being used for a title name. Level titles are limited to alphanumeric characters. Since the search bar does not permit the use of characters that are not letters or numbers, levels that use dashes at the beginning of their title (ex. [[-sirius-]]) cannot be searched. Instead, they must be found by searching the creator's levels or scrolling through the options in the search menu. Currently, levels with special characters cannot be uploaded to the server. When the play clicks the plus (+) icon, the name writes ''Unnamed'' or ''Level Name''. | |||
===Lengths=== | |||
*Level lengths are determined as follows: | |||
**Tiny: 0-9 seconds (includes copied levels until edited) | |||
**Short: 10-29 seconds | |||
**Medium: 30-59 seconds | |||
**Long: 60-119 seconds | |||
**XL: 120+ seconds | |||
**Plat.: All levels in Platformer game type | |||
== | ===Custom songs=== | ||
[[File:NewgroundsAudioNotice.jpg|right|270px]] | |||
Since [[Update 1.9]], instead of using the soundtracks used in main levels, there is the option to download other music from the [https://www.newgrounds.com/audio Newgrounds Audio Portal]. | |||
Since [[Update 2.2]], instead of using the soundtracks used in main levels and the [https://www.newgrounds.com/audio Newgrounds Audio Portal], you can use 6000+ songs in a music library, from Nocopyrightsounds(NCS) and from other creators. | |||
If a Newgrounds song is completely verified, it can be used in the game. To do so, you must select the gear button in the top right corner, select the "Custom" option, and then type in the ID of the desired song. To find the ID of the song, you can find the song on Newgrounds. They then must download the song and click the Use button, which will use the song in the level. Anything that pulses to a regular song (such as rings and certain decorations) can also pulse to a custom song if there is a clear beat. If you have downloaded a song, you can also click the saved songs button to quickly use a downloaded song in your level. However, there is a limit to the number of songs you can have saved. Despite this, in the options menu, there is an option to remove this limit. | |||
In the custom songs menu, there is a gear to change the start offset, playtest the music and make the music fade in or fade out. | |||
There is a guideline editor that creates guidelines for the song. You can again put the start offset, and you can record the guidelines. You can clear them using the Clear button. | |||
====Whitelisted artists==== | |||
When custom music was added to the game, many people uploaded others' music to their Newgrounds page in order to use specific tracks. They then forced others in the community to scout them (Newgrounds' system of verification for allowing users to upload their songs to the audio portal: more info can be found [https://www.newgrounds.com/bbs/topic/1318101 here]), and Newgrounds moderators spent hours of their time deleting these songs. To address this, an internal whitelist of artists whose music would be allowed to be used in the game was created. Prior to March 2020, only the developer could add artists to the whitelist, where now elder moderators can also add to the list. | |||
See also: [https://web.archive.org/web/20220915050329/http://robtopgames.com/blog/2017/02/01/geometry-dash-newgrounds Geometry Dash + Newgrounds Blog Post] | |||
===Fonts=== | |||
The level editor contains 60 fonts that the player can choose from: | |||
{| class="wikitable" | |||
!Fonts 1-20 | |||
!Fonts 21-40 | |||
!Fonts 41-60 | |||
|- | |||
| | |||
*'''Font 1:''' Pusab (default) | |||
*'''Font 2:''' TRS Million | |||
*'''Font 3:''' SF Distant Galaxy | |||
*'''Font 4:''' Relish Gargler | |||
*'''Font 5:''' Joystix | |||
*'''Font 6:''' Good Dog | |||
*'''Font 7:''' Dancing Script | |||
*'''Font 8:''' Stencilla | |||
*'''Font 9:''' Xirod | |||
*'''Font 10:''' Minecraftory | |||
*'''Font 11:''' Super Mario 256 | |||
*'''Font 12:''' Ketchum | |||
*'''Font 13:''' Gargle | |||
*'''Font 14:''' Amatic | |||
*'''Font 15:''' Cartwheel | |||
*'''Font 16:''' Mothproof Scipt | |||
*'''Font 17:''' Lemon Milk Bold | |||
*'''Font 18:''' Lemon Milk | |||
*'''Font 19:''' Minecraft | |||
*'''Font 20:''' Optimus Princeps | |||
| | |||
*'''Font 21:''' Autolova | |||
*'''Font 22:''' Karate | |||
*'''Font 23:''' A Annyeong Hayseyo | |||
*'''Font 24:''' Ausweis Hollow | |||
*'''Font 25:''' Gyspy Curse | |||
*'''Font 26:''' Magic School Two | |||
*'''Font 27:''' Old English Five | |||
*'''Font 28:''' Yea Papa | |||
*'''Font 29:''' Ninja Naruto | |||
*'''Font 30:''' Metal Lord | |||
*'''Font 31:''' Drip Drop | |||
*'''Font 32:''' Electroharmonix | |||
*'''Font 33:''' Aladin | |||
*'''Font 34:''' Creepster | |||
*'''Font 35:''' Call Of Ops Duty | |||
*'''Font 36:''' BlocParty | |||
*'''Font 37:''' Astron Boy | |||
*'''Font 38:''' Osaka Sans Serif | |||
*'''Font 39:''' Some Time Later | |||
*'''Font 40:''' Fatboy Slim BLTC | |||
| | |||
*'''Font 41:''' Moria Citadel | |||
*'''Font 42:''' Rise of Kingdom | |||
*'''Font 43:''' Fantaisie Artistique | |||
*'''Font 44:''' Edge of the Galaxy | |||
*'''Font 45:''' Wash Your Hand | |||
*'''Font 46:''' Bitwise | |||
*'''Font 47:''' Foul Fiend | |||
*'''Font 48:''' Nandaka Western | |||
*'''Font 49:''' Evil Empire | |||
*'''Font 50:''' Comical Cartoon | |||
*'''Font 51:''' Carton Six | |||
*'''Font 52:''' Assassin Ninja | |||
*'''Font 53:''' Public Pixel | |||
*'''Font 54:''' New Walt Disney UI | |||
*'''Font 55:''' Random 5 | |||
*'''Font 56:''' Crafting Lesson | |||
*'''Font 57:''' Game Of Squids | |||
*'''Font 58:''' Monster Game | |||
*'''Font 59:''' Lo-sumires | |||
*'''Font 60:''' Gewtymol | |||
|} | |||
The chosen font affects the appearance of the attempt count and all text objects in the level. A level can only have one font, and it cannot be changed mid-level. | |||
===Objects=== | |||
''For more information about objects, see [[Objects]].'' | |||
*The limit of objects able to be used in a level was initially 4,000 objects. | |||
*In [[Update 1.3]], the limit was raised to 6,000 objects. | |||
*In [[Update 1.6]], the limit was raised to 8,000 objects. | |||
*In [[Update 1.7]], the limit was raised to 10,000 objects. | |||
*In [[Update 1.8]], the limit was raised to 12,000 objects. | |||
*In [[Update 1.9]], the limit was raised to 15,000 objects. | |||
*In Update 1.921, the limit was raised to 20,000 objects. | |||
*In [[Update 2.0]], the limit was raised to 30,000 objects. | |||
*In [[Update 2.1]], the limit was raised to 80,000 objects, with a secondary 'limit' at 40,000 objects. | |||
*In [[Update 2.2]], there is no longer a hard limit on object count. The first 'limit' at 40,000 objects and the second 'limit' at 80,000 objects still exist, but both can be removed. | |||
==Editor Features== | |||
===Buttons=== | |||
In the editor, there are many buttons. Here is an image of all of them labelled (explanations further below): | |||
<gallery mode="packed"> | |||
File:editor_build.jpg|The level editor with the build tab open, buttons are labelled here | |||
File:editor_edit.jpg|The level editor with the edit tab open | |||
File:editor_delete.jpg|The level editor with the delete tab open | |||
</gallery> | |||
{| class="wikitable" | |||
! colspan="2" |Left Buttons (Top to Bottom; Red Square) | |||
! colspan="4" |Right Buttons (Left to Right, Top to Bottom; Magenta Square) | |||
!Editor Modes (Top to Bottom; Light Blue Square) | |||
!Editing Modes (Top to Bottom, Left to Right; Green Square) | |||
!Top UI (Left to Right; Orange & Purple Circles) | |||
!Editor Layers (Left to Right; White Arrow) | |||
|- | |||
|Preview Music: Sends a green "music bar" through the level, which can change direction or speed if the right objects are placed. The music plays while this happens. | |||
|Ignore Linked Objects: This and the 3 buttons below it must be activated through the "Link Controls" option (see below for more information), this one specifically ignores the effects of the other 2. | |||
|Copy: Copies the selected object(s). | |||
|Edit Special: Only works for some objects (like [[transporters]], [[portals]], and some [[triggers]]), pulls up a menu associated with that object. | |||
|Copy Values: Copies an object's colour, groupID, and extra attributes (found in "Edit Group"). | |||
|Colour/HSV: Allows you to edit the colour and see it update in real time. Once clicked/tapped the first time, it turns into an HSV (Hue-Saturation-Value) button, which allows you to edit the Hue, Saturation, and Brightness (Value) of an object. | |||
|Build Mode: In this mode, clicking/tapping places an object within the nearest grid tile. On the toolbar (right next to these buttons), there are many hundreds of objects for you to select for placement. If you click/tap an object without any object selected, then that object is automatically selected on the toolbar. | |||
|Swipe Mode: This allows you to drag (your cursor on PC) to place/delete many objects, or select objects in an area. | |||
|Undo: The left-facing arrow, undoes the previous action. | |||
|"All" Layer: Would be where the white arrow is, takes you to the "All" layer (which shows every object in the level). | |||
|- | |||
|Playtest: Starts the level in the editor, during this all triggers are still visible, and enter effects don't do anything. | |||
|Link Objects: Links 2 objects together; they behave as if they were one object, mainly they're selected & deleted together. | |||
|Paste: Pastes the copied object(s) at your current position in the editor (there is an option to see this visually). | |||
|Edit Group: A menu with a lot of options for doing things like adding groups or gameplay channels to objects; see the "Edit Group" section for more information. | |||
|Paste State: Pastes every attribute from the object "Copy Values" was used on, except for colour. | |||
|Go To Layer: Goes to the selected object's(s') Editor Layer. See the rightmost column | |||
|Edit Mode: In this mode, clicking/tapping an object selects it; selected objects are highlighted green. On the toolbar, there are options for moving, rotating, or scaling objects. | |||
|Free Rotate Mode: This allows you to rotate objects freely (unless they are static objects, see below for more information on static objects) in any direction at any amount of degrees. | |||
|Redo: The right-facing arrow, redoes an undone action, and becomes unusable once a new action is done. | |||
|Previous Layer: Goes to the previous editor layer ("All" if the current layer is 0). | |||
|- | |||
|Zoom In: Zooms the camera in. | |||
|Unlink Objects: Undoes the effect the Link Objects button applies. | |||
|Copy + Paste: Duplicates the selected object(s) on top of itself/themselves. | |||
|Edit Object: Used for just about every object; for many, it controls colour; for triggers, it allows you to edit their behaviour; for portals, it gives you camera options. | |||
|Paste Colour: The oppisite of "Paste State", only pastes colour. | |||
|De-Select: De-selects the currently selected object(s). | |||
|Delete Mode: In this mode, click/tapping an object deletes it. On the toolbar, you can select filters for deleting only certain objects. | |||
|Free Move Mode: This allows you to drag objects to move them freely; the object currently being freely moved is highlighted orange. Said object is automatically selected after the movement is finished. | |||
|Delete Button: The trash can, deletes the selected object(s). | |||
|Current Layer: The editor layer you're currently in. Editor layers are set through the "Edit Group" menu. Only objects in the current editor can be selected and deleted, and objects you place are placed in the current editor layer; objects not in the current editor layer appear at a lower opacity. If you place an object while in the "All" layer, it is placed in editor layer 0. | |||
|- | |||
|Zoom Out: Zooms the camera out. | |||
|colspan="6"|— | |||
|Grid Snap Mode: Used with Free Move Mode, objects are snapped to the nearest grid space when moved. | |||
|Position Slider: Slider with the knob containing a dual arrow, used to move through the level faster. | |||
|Next Layer: Goes to the next editor layer (0 if the current layer is "All"). | |||
|- | |||
|colspan="8"|— | |||
|Level Settings (Orange Circle): Various settings for the level you're currently editing. See below for more information. | |||
|- | |||
|colspan="8"|— | |||
|Pause button (Purple Circle): Brings up the pause menu, in here you can save and/or exit the level or set ''editor'' settings (these apply to the editor in general, not just the level you're in). See below for more information. | |||
|} | |||
<hr> | |||
===Pause Menu & Editor Settings=== | |||
This menu contains various tools, as well as the settings that apply to the editor itself. Some are found inside the extra settings menu (indicated by the gear button) within the pause menu. | |||
<br> | |||
<gallery mode="packed"> | |||
Pause main.jpg|Pause menu | |||
Pause settings 0.jpg|Extra settings, pg 1 | |||
Pause settings 1.jpg|Extra settings, pg 2 | |||
Pause settings 2.jpg|Extra settings, pg 3 | |||
</gallery> | |||
{| class="wikitable" | |||
! colspan="4" |Main Pause Menu | |||
! colspan="3" |Extra Settings Menu | |||
|- | |||
!Checkboxes | |||
!Center Buttons | |||
!Editor Tools (Left) | |||
!Editor Tools (Right) | |||
!Page 1 | |||
!Page 2 | |||
!Page 3 | |||
|- | |||
|Show Hitboxes: Shows the hitboxes of every object that has one. The hitboxes' colours correspond to their object types: | |||
*Blue Hitboxes: Static objects, solid platforms, can only be rotated at 90° increments. | |||
*Cyan Hitboxes: Passable hitboxes, platforms that only have collision when landing on the side opposite the direction of gravity (if gravity is down, like default, only the top side has collision). Can only be rotated at 90° increments, can only be achieved through "Edit Group". | |||
*Magenta Hitboxes: GripSlope hitboxes, slope hitboxes the player doesn't slide off of, ''only works in platformer mode.'' Can only be rotated at 90° increments, can only be achieved through "Edit Group". | |||
*Red Hitboxes: Hazards, they kill the player when it touches one. | |||
*Green Hitboxes: Interactable objects; indicate orbs, pads, portals, coins, checkpoints, and pickups. | |||
[[File:hitboxes.jpg|270px|thumb|All the hitboxes, in the order listed above.]] | |||
|Resume: Returns you to the level editor. | |||
|Re-group: Changes the group(s) of the selected object(s) to the next free group(s), consistently keeping any matching groups; also changes group(s) (and for some reason itemIDs) used inside triggers. | |||
|Keys (PC only): Shows editor keybinds; as of 2.2081, these cannot be customized, though [[RobTop]] does seem to have plans to allow for that. | |||
|Draw Trigger Boxes: Shows cyan hitboxes around touch triggers and, for some reason, collectibles. | |||
|Swipe Cycle Mode: If you have swipe mode on, and the grid space you're selecting on has stacked objects, you cycle through the objects each time you select (as if swiping wasn't enabled). | |||
|Static Trace Arrows: Disables the arrows seen with the trace in/out options from moving. | |||
|- | |||
|Hide Invisible: Hides objects with an opacity of 0, whether through colour channels, the alpha trigger, or the "Hide" option (see "Edit Group" below). | |||
|Save & Play: Saves the level and takes you to main gameplay (this is where you play the ''real'' level). | |||
|Create Loop: Creates a spawn loop, a spawn loop is simply a spawn trigger setup that infinitely loops multiple triggers. | |||
|Build Helper: Re-group, without changing groups used inside triggers (I am not even joking it's almost the same thing) | |||
|Playtest Music: Enables music while playtesting. | |||
|Show Clicks: When playtesting, orange squares are shown when the player clicks, or when you activate a gameplay trigger for some reason. | |||
|rowspan="11"|— | |||
|- | |||
|Preview Mode: Shows the actual colours of objects and the BG, G, and MG. | |||
|Save & Exit: Saves the level and takes you back to the levels page. | |||
|AlignX: Evenly spaces out all selected objects along the x-axis, y-axis is ignored. | |||
|Copy + Colour: Copies an object and its colour. This isn't too useful seeing as copying an object already copies its colour anyways. | |||
|Duration Lines: Shows low-opacity white lines extending from triggers, showing their duration, a setting set inside triggers. | |||
|Hide Path: Hides the green path left behind by your icon while playtesting. | |||
|- | |||
|Preview Animations: Shows the animations of monsters and the rotation of sawblade objects. | |||
|Save: Just saves the level data. | |||
|AlignY: Evenly spaces out all selected objects along the y-axis, x-axis is ignored. | |||
|Paste + Colour: Pastes an object and its colour at your current editor position. | |||
|Playtest No Grid: Turns off the grid while playtesting. | |||
|Hide Particle Icons: Hides all particle editor objects, just shows the particles; they can still be selected & edited normally. | |||
|- | |||
|Preview Particles: Shows particle effects in the editor. | |||
|Exit: Takes you back to the levels page '''''without saving the level,''''' be careful. | |||
|Select All: Selects every single object in the current editor layer. | |||
|Create Extras: Creates solid outlines around the currently selected objects. | |||
|Enable Link Controls: Enables the Ignore Link, Link, and Unlink buttons in the editor (see "Buttons" above). | |||
|Playtest Smooth Fix: Enables smooth fix when playtesting in the editor (this is a main game setting). | |||
|- | |||
|Preview Shaders: Shows shader effects in the editor. | |||
|Toggle Music Guidelines: The circular button on the left, toggles the music guidelines in the editor (see "level settings for more info"). If there is a red circle with a diagonal line over the button, music guidelines are off. | |||
|Select All Left: Selects every single object left of your current editor position and in the current editor layer. | |||
|Unlock layers: If "Layer Locking" is on (see 6th column), and/or you've locked any Editor Layers, then all editor layers are unlocked. | |||
|Playtest No UI: Hides the editor buttons and the position slider while playtesting, except for the Playtest button (now Pause Playtest) and the Stop Playtest button that appears when playtesting. | |||
|Disable Paste State Groups: GroupIDs are no longer pasted onto objects "Paste State" is used on. | |||
|- | |||
|Show Ground: Shows the ground in the editor, if turned off the ground is visually replaced by a white line in the editor. | |||
|Help: Opens the official editor guide by [[Viprin|ViPriN]] and AutoNick. It's 206 pages long. | |||
|Select All Right: Selects every single object right of your current editor position and in the current editor layer. | |||
|Reset Unused: Resets colour channels not being used by any objects to white with 1.00 opacity, and makes them available as "Next Free". | |||
|Effect Lines: Shows cyan vertical lines under and above triggers that aren't touch- or spawn-triggered. | |||
|Layer Locking: Allows you to lock the current Editor Layer by tapping/clicking the number. Objects in locked Editor Layers cannot be selected unless linked to objects in unlocked Editor Layers or unless their own layer is unlocked. | |||
|- | |||
|Show Object Info: Shows information about the selected object(s) - such as colour, group, and position - to the right of the Preview Music button, below the Redo button. | |||
|— | |||
|New GroupX: Functions as "Build Helper", but in order from left to right (see next column, top). | |||
|Uncheck Portals: Unchecks the "Preview" checkbox on all gamemode portals (see "Edit Group") | |||
|Grid On Top: Moves the grid between the MG and G layers. | |||
|Auto-Pause: Automatically pauses when you start playtesting. This is useful if playtest is taking a while to load, and you don't want your icon to die immediately. | |||
|- | |||
|Show Grid: Shows the grid in the editor, disabling it ''does '''not''''' disable any grid-snapping behaviour. | |||
|— | |||
|New GroupY: Functions as "Build Helper", but in order from bottom to top (see next column, top). | |||
|— | |||
|Hide Background: Replaces the BG with a dark gray gradient that gets darker as you go up. | |||
|Start Optimization: Tries speeding up loading with start positions when playtesting. This is an experimental feature that is probably here for the same reason as "Auto-Pause". | |||
|- | |||
|Select Filter: Allows the deletion filters seen on the delete toolbar (on the right side) to also filter object selections, meaning you can only select what the delete filter allows you to delete. | |||
|colspan="3"|— | |||
|Hold To Swipe: When checked, holding anywhere for ~.35 seconds (7/20 of a second), swipe mode is temporarily activated (basically "hold + drag for swipe without swipe mode"). | |||
|Increase Undo/Redo: Increases the amount of time undo/redo may be used before the game stops bothering to remember what there is to be undone/redone. | |||
|- | |||
|Ignore Damage: Player receives no damage from sources that would otherwise kill the player, wave slides on surfaces. | |||
|colspan="3"|— | |||
|Buttons Per Row: How many buttons should be in each row on the toolbar. Minimum 6, maximum 12. | |||
|Increase Scale: Doubles the max scale limit and halves the min scale limit. (0.5—2 —→ 0.25—4). Max and min scale never affects the warp tool. | |||
|- | |||
|colspan="4"|— | |||
|Button Rows: How many rows of buttons should be displayed on the toolbar, can only be 2 or 3. | |||
|Small Warp Buttons: Shrinks the buttons that are dragged when using the warp tool. | |||
|} | |||
<hr> | |||
===Level settings=== | |||
This menu contains the settings only for the level you are currently editing. They're mainly for starting options for the player and legacy compatibility. | |||
[WIP...] | |||
===Edit group=== | |||
[WIP...] | |||
==Trivia== | |||
*A level can only be verified if it is completed in normal mode without a Start Position. All user coins, if included, must be collected (although not all in a single attempt). | |||
**However, the initial release [https://forums.toucharcade.com/showpost.php?p=2942594&postcount=94 allowed practice mode to be used to verify levels]. | |||
*Prior to Update 1.8, level data was stored in base-64 format. Now it is encoded in a different format, probably so it cannot be decoded as easily as before. | |||
*Prior to Update 2.2, an example song ID could be found if the player clicked the "Help" button in the custom song selection menu. The ID, 568699, is the Newgrounds song ID for "[[Hexagon Force]]" by Waterflame. | |||
*In Update 1.9, the Geometry Dash editor had 5 buttons: Copy, Paste, Copy and Paste, Edit Object, and Deselect. However, the Geometry Dash Steam trailer shows an editor with four buttons: Copy and Paste, Edit Object, Deselect, and Edit Group. | |||
**The Edit Group button was not introduced until Update 1.921, suggesting that the version of Geometry Dash used in the Steam trailer was a development version. | |||
*In Update 2.1, all of the colour triggers (BG, Ground, Ground2, Line, 3DL, Obj) were merged into one colour trigger. However, original colour triggers are still in-game to keep 2.1 and newer updates compatible with older levels. | |||
**The only exception is the BG trigger, whose "Tint Ground" feature, which also coloured G1, is no longer accessible; though BG triggers from previous updates that had this option selected still work. | |||
*In Update 2.1, colour channels 1,000 through 1,007 and 1,009 through 1,012 were reserved for BG, Ground, Line, 3DL, Object, Player Colour 1, Player Colour 2, Light BG, Ground 2, Black, White, and Lighter respectively; attempting to use them would crash the game. Despite the bug being "fixed" in Update 2.11, players can still type in colours past 999; colours after 1,012 crash the game due to out-of-bounds edits. | |||
**In Update 2.2, colour channels 1013 and 1014 are reserved for Middleground 1 and Middleground 2, respectively. Colour channel 1008 remains unused. | |||
*The version of the orange teleportation portal introduced in Update 2.0 does not have a button in the editor, as it is automatically placed above the blue teleportation portal along its y-axis. It is bound to the blue entry portal by necessity of its function and consequently cannot be independently moved along its own x-axis. | |||
**In Update 2.2, a new orange teleportation portal was introduced, which ''can'' be independently placed on the x-axis. A second blue teleportation portal was also introduced, which works in tandem with this new variant. | |||
*The second rainbow 26.5° slope is split up into two blocks for no known reason. | |||
*All the 2.1 slopes appear in the first tab for no known reason. | |||
*When the "Dynamic Level Height" option is not selected, the player is killed if they exceed an elevation of roughly 88.5 grid spaces above the ground height. | |||
*When selecting teleportation portals, the "group parent" option is replaced with a "smooth ease" option. When this option is checked, the camera will slowly pan to the exit portal, rather than panning instantly. | |||
*The message "You can't create more than 100 custom objects" is misleading, as the actual custom object limit is 50. | |||
*2.1 uses RGB-4444 for gradients, 2.2 uses RGB-8888 for gradients. | |||
*As of 2.2, level descriptions have a limit of 180 characters. | |||
**In 2.1, level descriptions had a limit of 140 characters. | |||
*The editor is an '''advanced''' feature in Geometry Dash. View the [https://www.robtopgames.com/files/GDEditor.pdf Editor Guide] for more details. A '''lot''' more details. | |||
==Gallery== | |||
<tabber> | |||
Toolbars= | |||
<gallery mode="packed"> | |||
LevelEditorBuildToolbar.png|Build toolbar | |||
LevelEditorEditToolbar.png|Edit toolbar | |||
LevelEditorDeleteToolbar.png|Delete toolbar | |||
</gallery> | |||
|-| | |||
Menus= | |||
<gallery mode="packed"> | |||
ObjectSetupMenu.png|Object setup menu | |||
TextSetupMenu.png|Text setup menu | |||
GroupSetupMenu.png|Edit group menu | |||
LevelEditorSettings.png|Settings menu | |||
CustomSongSelectionMenu.png|Song selection menu | |||
LevelEditorPauseMenu.png|Pause menu | |||
</gallery> | |||
|-| | |||
Editor Guides= | |||
<gallery mode="packed"> | |||
LevelEditorGuideOriginal.png|Initial release level editor guide | |||
LevelEditorGuideUpdate1.9.png|Update 1.9 level editor guide | |||
LevelEditorGuideUpdate2.0.png|Update 2.0 level editor guide | |||
LevelEditorGuideUpdate2.1.png|Update 2.1 level editor guide | |||
</gallery> | |||
|-| | |||
Miscellaneous= | |||
<gallery mode="packed"> | |||
LevelEditorEarliest.png|Update 1.4 level editor | |||
LevelEditorEarlier.png|Update 1.5 level editor | |||
LevelEditorEarly.png|Update 1.7 level editor | |||
NewgroundsAudioNotice.jpg|Newgrounds audio notice | |||
</gallery> | |||
</tabber> | |||
[[Category:Level editing (base content)]] | |||
Latest revision as of 19:17, 11 October 2026

The Level Editor is a feature in Geometry Dash which allows players to create their own user levels and share them online for others to play. It is only available in the full version of Geometry Dash.
Description
[edit | edit source]Title
[edit | edit source]The title of a level signifies its name, having a character limit of 20 characters. Spaces also count as characters when being used for a title name. Level titles are limited to alphanumeric characters. Since the search bar does not permit the use of characters that are not letters or numbers, levels that use dashes at the beginning of their title (ex. -sirius-) cannot be searched. Instead, they must be found by searching the creator's levels or scrolling through the options in the search menu. Currently, levels with special characters cannot be uploaded to the server. When the play clicks the plus (+) icon, the name writes Unnamed or Level Name.
Lengths
[edit | edit source]- Level lengths are determined as follows:
- Tiny: 0-9 seconds (includes copied levels until edited)
- Short: 10-29 seconds
- Medium: 30-59 seconds
- Long: 60-119 seconds
- XL: 120+ seconds
- Plat.: All levels in Platformer game type
Custom songs
[edit | edit source]
Since Update 1.9, instead of using the soundtracks used in main levels, there is the option to download other music from the Newgrounds Audio Portal.
Since Update 2.2, instead of using the soundtracks used in main levels and the Newgrounds Audio Portal, you can use 6000+ songs in a music library, from Nocopyrightsounds(NCS) and from other creators.
If a Newgrounds song is completely verified, it can be used in the game. To do so, you must select the gear button in the top right corner, select the "Custom" option, and then type in the ID of the desired song. To find the ID of the song, you can find the song on Newgrounds. They then must download the song and click the Use button, which will use the song in the level. Anything that pulses to a regular song (such as rings and certain decorations) can also pulse to a custom song if there is a clear beat. If you have downloaded a song, you can also click the saved songs button to quickly use a downloaded song in your level. However, there is a limit to the number of songs you can have saved. Despite this, in the options menu, there is an option to remove this limit.
In the custom songs menu, there is a gear to change the start offset, playtest the music and make the music fade in or fade out.
There is a guideline editor that creates guidelines for the song. You can again put the start offset, and you can record the guidelines. You can clear them using the Clear button.
Whitelisted artists
[edit | edit source]When custom music was added to the game, many people uploaded others' music to their Newgrounds page in order to use specific tracks. They then forced others in the community to scout them (Newgrounds' system of verification for allowing users to upload their songs to the audio portal: more info can be found here), and Newgrounds moderators spent hours of their time deleting these songs. To address this, an internal whitelist of artists whose music would be allowed to be used in the game was created. Prior to March 2020, only the developer could add artists to the whitelist, where now elder moderators can also add to the list.
See also: Geometry Dash + Newgrounds Blog Post
Fonts
[edit | edit source]The level editor contains 60 fonts that the player can choose from:
| Fonts 1-20 | Fonts 21-40 | Fonts 41-60 |
|---|---|---|
|
|
|
The chosen font affects the appearance of the attempt count and all text objects in the level. A level can only have one font, and it cannot be changed mid-level.
Objects
[edit | edit source]For more information about objects, see Objects.
- The limit of objects able to be used in a level was initially 4,000 objects.
- In Update 1.3, the limit was raised to 6,000 objects.
- In Update 1.6, the limit was raised to 8,000 objects.
- In Update 1.7, the limit was raised to 10,000 objects.
- In Update 1.8, the limit was raised to 12,000 objects.
- In Update 1.9, the limit was raised to 15,000 objects.
- In Update 1.921, the limit was raised to 20,000 objects.
- In Update 2.0, the limit was raised to 30,000 objects.
- In Update 2.1, the limit was raised to 80,000 objects, with a secondary 'limit' at 40,000 objects.
- In Update 2.2, there is no longer a hard limit on object count. The first 'limit' at 40,000 objects and the second 'limit' at 80,000 objects still exist, but both can be removed.
Editor Features
[edit | edit source]Buttons
[edit | edit source]In the editor, there are many buttons. Here is an image of all of them labelled (explanations further below):
-
 The level editor with the build tab open, buttons are labelled here
 -
 The level editor with the edit tab open
 -
 The level editor with the delete tab open
| Left Buttons (Top to Bottom; Red Square) | Right Buttons (Left to Right, Top to Bottom; Magenta Square) | Editor Modes (Top to Bottom; Light Blue Square) | Editing Modes (Top to Bottom, Left to Right; Green Square) | Top UI (Left to Right; Orange & Purple Circles) | Editor Layers (Left to Right; White Arrow) | ||||
|---|---|---|---|---|---|---|---|---|---|
| Preview Music: Sends a green "music bar" through the level, which can change direction or speed if the right objects are placed. The music plays while this happens. | Ignore Linked Objects: This and the 3 buttons below it must be activated through the "Link Controls" option (see below for more information), this one specifically ignores the effects of the other 2. | Copy: Copies the selected object(s). | Edit Special: Only works for some objects (like transporters, portals, and some triggers), pulls up a menu associated with that object. | Copy Values: Copies an object's colour, groupID, and extra attributes (found in "Edit Group"). | Colour/HSV: Allows you to edit the colour and see it update in real time. Once clicked/tapped the first time, it turns into an HSV (Hue-Saturation-Value) button, which allows you to edit the Hue, Saturation, and Brightness (Value) of an object. | Build Mode: In this mode, clicking/tapping places an object within the nearest grid tile. On the toolbar (right next to these buttons), there are many hundreds of objects for you to select for placement. If you click/tap an object without any object selected, then that object is automatically selected on the toolbar. | Swipe Mode: This allows you to drag (your cursor on PC) to place/delete many objects, or select objects in an area. | Undo: The left-facing arrow, undoes the previous action. | "All" Layer: Would be where the white arrow is, takes you to the "All" layer (which shows every object in the level). |
| Playtest: Starts the level in the editor, during this all triggers are still visible, and enter effects don't do anything. | Link Objects: Links 2 objects together; they behave as if they were one object, mainly they're selected & deleted together. | Paste: Pastes the copied object(s) at your current position in the editor (there is an option to see this visually). | Edit Group: A menu with a lot of options for doing things like adding groups or gameplay channels to objects; see the "Edit Group" section for more information. | Paste State: Pastes every attribute from the object "Copy Values" was used on, except for colour. | Go To Layer: Goes to the selected object's(s') Editor Layer. See the rightmost column | Edit Mode: In this mode, clicking/tapping an object selects it; selected objects are highlighted green. On the toolbar, there are options for moving, rotating, or scaling objects. | Free Rotate Mode: This allows you to rotate objects freely (unless they are static objects, see below for more information on static objects) in any direction at any amount of degrees. | Redo: The right-facing arrow, redoes an undone action, and becomes unusable once a new action is done. | Previous Layer: Goes to the previous editor layer ("All" if the current layer is 0). |
| Zoom In: Zooms the camera in. | Unlink Objects: Undoes the effect the Link Objects button applies. | Copy + Paste: Duplicates the selected object(s) on top of itself/themselves. | Edit Object: Used for just about every object; for many, it controls colour; for triggers, it allows you to edit their behaviour; for portals, it gives you camera options. | Paste Colour: The oppisite of "Paste State", only pastes colour. | De-Select: De-selects the currently selected object(s). | Delete Mode: In this mode, click/tapping an object deletes it. On the toolbar, you can select filters for deleting only certain objects. | Free Move Mode: This allows you to drag objects to move them freely; the object currently being freely moved is highlighted orange. Said object is automatically selected after the movement is finished. | Delete Button: The trash can, deletes the selected object(s). | Current Layer: The editor layer you're currently in. Editor layers are set through the "Edit Group" menu. Only objects in the current editor can be selected and deleted, and objects you place are placed in the current editor layer; objects not in the current editor layer appear at a lower opacity. If you place an object while in the "All" layer, it is placed in editor layer 0. |
| Zoom Out: Zooms the camera out. | — | Grid Snap Mode: Used with Free Move Mode, objects are snapped to the nearest grid space when moved. | Position Slider: Slider with the knob containing a dual arrow, used to move through the level faster. | Next Layer: Goes to the next editor layer (0 if the current layer is "All"). | |||||
| — | Level Settings (Orange Circle): Various settings for the level you're currently editing. See below for more information. | ||||||||
| — | Pause button (Purple Circle): Brings up the pause menu, in here you can save and/or exit the level or set editor settings (these apply to the editor in general, not just the level you're in). See below for more information. | ||||||||
Pause Menu & Editor Settings
[edit | edit source]This menu contains various tools, as well as the settings that apply to the editor itself. Some are found inside the extra settings menu (indicated by the gear button) within the pause menu.
-
 Pause menu
 -
 Extra settings, pg 1
 -
 Extra settings, pg 2
 -
 Extra settings, pg 3
| Main Pause Menu | Extra Settings Menu | |||||
|---|---|---|---|---|---|---|
| Checkboxes | Center Buttons | Editor Tools (Left) | Editor Tools (Right) | Page 1 | Page 2 | Page 3 |
Show Hitboxes: Shows the hitboxes of every object that has one. The hitboxes' colours correspond to their object types:
 |
Resume: Returns you to the level editor. | Re-group: Changes the group(s) of the selected object(s) to the next free group(s), consistently keeping any matching groups; also changes group(s) (and for some reason itemIDs) used inside triggers. | Keys (PC only): Shows editor keybinds; as of 2.2081, these cannot be customized, though RobTop does seem to have plans to allow for that. | Draw Trigger Boxes: Shows cyan hitboxes around touch triggers and, for some reason, collectibles. | Swipe Cycle Mode: If you have swipe mode on, and the grid space you're selecting on has stacked objects, you cycle through the objects each time you select (as if swiping wasn't enabled). | Static Trace Arrows: Disables the arrows seen with the trace in/out options from moving. |
| Hide Invisible: Hides objects with an opacity of 0, whether through colour channels, the alpha trigger, or the "Hide" option (see "Edit Group" below). | Save & Play: Saves the level and takes you to main gameplay (this is where you play the real level). | Create Loop: Creates a spawn loop, a spawn loop is simply a spawn trigger setup that infinitely loops multiple triggers. | Build Helper: Re-group, without changing groups used inside triggers (I am not even joking it's almost the same thing) | Playtest Music: Enables music while playtesting. | Show Clicks: When playtesting, orange squares are shown when the player clicks, or when you activate a gameplay trigger for some reason. | — |
| Preview Mode: Shows the actual colours of objects and the BG, G, and MG. | Save & Exit: Saves the level and takes you back to the levels page. | AlignX: Evenly spaces out all selected objects along the x-axis, y-axis is ignored. | Copy + Colour: Copies an object and its colour. This isn't too useful seeing as copying an object already copies its colour anyways. | Duration Lines: Shows low-opacity white lines extending from triggers, showing their duration, a setting set inside triggers. | Hide Path: Hides the green path left behind by your icon while playtesting. | |
| Preview Animations: Shows the animations of monsters and the rotation of sawblade objects. | Save: Just saves the level data. | AlignY: Evenly spaces out all selected objects along the y-axis, x-axis is ignored. | Paste + Colour: Pastes an object and its colour at your current editor position. | Playtest No Grid: Turns off the grid while playtesting. | Hide Particle Icons: Hides all particle editor objects, just shows the particles; they can still be selected & edited normally. | |
| Preview Particles: Shows particle effects in the editor. | Exit: Takes you back to the levels page without saving the level, be careful. | Select All: Selects every single object in the current editor layer. | Create Extras: Creates solid outlines around the currently selected objects. | Enable Link Controls: Enables the Ignore Link, Link, and Unlink buttons in the editor (see "Buttons" above). | Playtest Smooth Fix: Enables smooth fix when playtesting in the editor (this is a main game setting). | |
| Preview Shaders: Shows shader effects in the editor. | Toggle Music Guidelines: The circular button on the left, toggles the music guidelines in the editor (see "level settings for more info"). If there is a red circle with a diagonal line over the button, music guidelines are off. | Select All Left: Selects every single object left of your current editor position and in the current editor layer. | Unlock layers: If "Layer Locking" is on (see 6th column), and/or you've locked any Editor Layers, then all editor layers are unlocked. | Playtest No UI: Hides the editor buttons and the position slider while playtesting, except for the Playtest button (now Pause Playtest) and the Stop Playtest button that appears when playtesting. | Disable Paste State Groups: GroupIDs are no longer pasted onto objects "Paste State" is used on. | |
| Show Ground: Shows the ground in the editor, if turned off the ground is visually replaced by a white line in the editor. | Help: Opens the official editor guide by ViPriN and AutoNick. It's 206 pages long. | Select All Right: Selects every single object right of your current editor position and in the current editor layer. | Reset Unused: Resets colour channels not being used by any objects to white with 1.00 opacity, and makes them available as "Next Free". | Effect Lines: Shows cyan vertical lines under and above triggers that aren't touch- or spawn-triggered. | Layer Locking: Allows you to lock the current Editor Layer by tapping/clicking the number. Objects in locked Editor Layers cannot be selected unless linked to objects in unlocked Editor Layers or unless their own layer is unlocked. | |
| Show Object Info: Shows information about the selected object(s) - such as colour, group, and position - to the right of the Preview Music button, below the Redo button. | — | New GroupX: Functions as "Build Helper", but in order from left to right (see next column, top). | Uncheck Portals: Unchecks the "Preview" checkbox on all gamemode portals (see "Edit Group") | Grid On Top: Moves the grid between the MG and G layers. | Auto-Pause: Automatically pauses when you start playtesting. This is useful if playtest is taking a while to load, and you don't want your icon to die immediately. | |
| Show Grid: Shows the grid in the editor, disabling it does not disable any grid-snapping behaviour. | — | New GroupY: Functions as "Build Helper", but in order from bottom to top (see next column, top). | — | Hide Background: Replaces the BG with a dark gray gradient that gets darker as you go up. | Start Optimization: Tries speeding up loading with start positions when playtesting. This is an experimental feature that is probably here for the same reason as "Auto-Pause". | |
| Select Filter: Allows the deletion filters seen on the delete toolbar (on the right side) to also filter object selections, meaning you can only select what the delete filter allows you to delete. | — | Hold To Swipe: When checked, holding anywhere for ~.35 seconds (7/20 of a second), swipe mode is temporarily activated (basically "hold + drag for swipe without swipe mode"). | Increase Undo/Redo: Increases the amount of time undo/redo may be used before the game stops bothering to remember what there is to be undone/redone. | |||
| Ignore Damage: Player receives no damage from sources that would otherwise kill the player, wave slides on surfaces. | — | Buttons Per Row: How many buttons should be in each row on the toolbar. Minimum 6, maximum 12. | Increase Scale: Doubles the max scale limit and halves the min scale limit. (0.5—2 —→ 0.25—4). Max and min scale never affects the warp tool. | |||
| — | Button Rows: How many rows of buttons should be displayed on the toolbar, can only be 2 or 3. | Small Warp Buttons: Shrinks the buttons that are dragged when using the warp tool. | ||||
Level settings
[edit | edit source]This menu contains the settings only for the level you are currently editing. They're mainly for starting options for the player and legacy compatibility. [WIP...]
Edit group
[edit | edit source][WIP...]
Trivia
[edit | edit source]- A level can only be verified if it is completed in normal mode without a Start Position. All user coins, if included, must be collected (although not all in a single attempt).
- However, the initial release allowed practice mode to be used to verify levels.
- Prior to Update 1.8, level data was stored in base-64 format. Now it is encoded in a different format, probably so it cannot be decoded as easily as before.
- Prior to Update 2.2, an example song ID could be found if the player clicked the "Help" button in the custom song selection menu. The ID, 568699, is the Newgrounds song ID for "Hexagon Force" by Waterflame.
- In Update 1.9, the Geometry Dash editor had 5 buttons: Copy, Paste, Copy and Paste, Edit Object, and Deselect. However, the Geometry Dash Steam trailer shows an editor with four buttons: Copy and Paste, Edit Object, Deselect, and Edit Group.
- The Edit Group button was not introduced until Update 1.921, suggesting that the version of Geometry Dash used in the Steam trailer was a development version.
- In Update 2.1, all of the colour triggers (BG, Ground, Ground2, Line, 3DL, Obj) were merged into one colour trigger. However, original colour triggers are still in-game to keep 2.1 and newer updates compatible with older levels.
- The only exception is the BG trigger, whose "Tint Ground" feature, which also coloured G1, is no longer accessible; though BG triggers from previous updates that had this option selected still work.
- In Update 2.1, colour channels 1,000 through 1,007 and 1,009 through 1,012 were reserved for BG, Ground, Line, 3DL, Object, Player Colour 1, Player Colour 2, Light BG, Ground 2, Black, White, and Lighter respectively; attempting to use them would crash the game. Despite the bug being "fixed" in Update 2.11, players can still type in colours past 999; colours after 1,012 crash the game due to out-of-bounds edits.
- In Update 2.2, colour channels 1013 and 1014 are reserved for Middleground 1 and Middleground 2, respectively. Colour channel 1008 remains unused.
- The version of the orange teleportation portal introduced in Update 2.0 does not have a button in the editor, as it is automatically placed above the blue teleportation portal along its y-axis. It is bound to the blue entry portal by necessity of its function and consequently cannot be independently moved along its own x-axis.
- In Update 2.2, a new orange teleportation portal was introduced, which can be independently placed on the x-axis. A second blue teleportation portal was also introduced, which works in tandem with this new variant.
- The second rainbow 26.5° slope is split up into two blocks for no known reason.
- All the 2.1 slopes appear in the first tab for no known reason.
- When the "Dynamic Level Height" option is not selected, the player is killed if they exceed an elevation of roughly 88.5 grid spaces above the ground height.
- When selecting teleportation portals, the "group parent" option is replaced with a "smooth ease" option. When this option is checked, the camera will slowly pan to the exit portal, rather than panning instantly.
- The message "You can't create more than 100 custom objects" is misleading, as the actual custom object limit is 50.
- 2.1 uses RGB-4444 for gradients, 2.2 uses RGB-8888 for gradients.
- As of 2.2, level descriptions have a limit of 180 characters.
- In 2.1, level descriptions had a limit of 140 characters.
- The editor is an advanced feature in Geometry Dash. View the Editor Guide for more details. A lot more details.
Gallery
[edit | edit source]


-
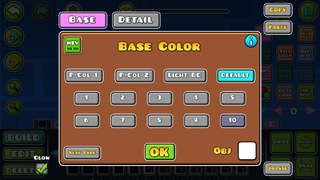 Object setup menu
 -
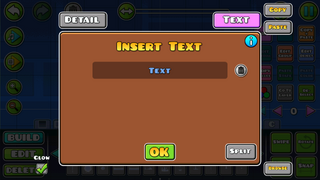 Text setup menu
 -
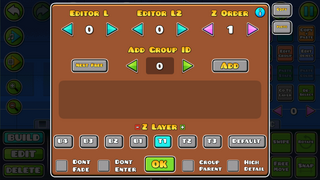 Edit group menu
 -
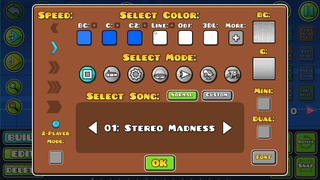 Settings menu
 -
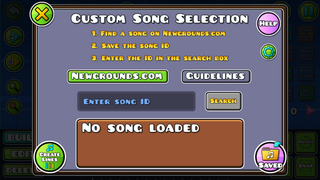 Song selection menu
 -
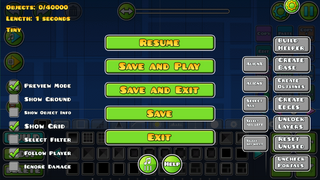 Pause menu


-
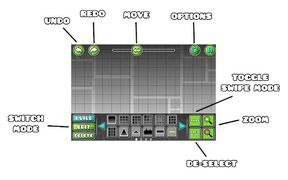 Initial release level editor guide
 -
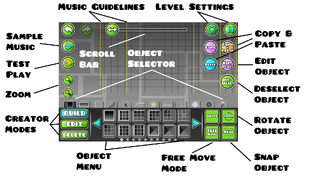 Update 1.9 level editor guide
 -
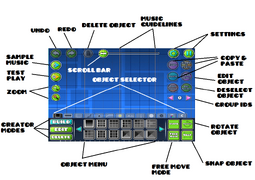 Update 2.0 level editor guide
 -
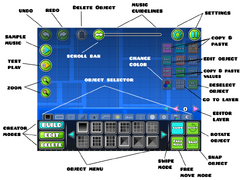 Update 2.1 level editor guide


-
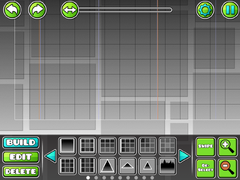 Update 1.4 level editor
 -
 Update 1.5 level editor
 -
 Update 1.7 level editor
 -
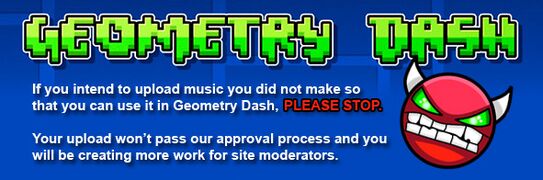 Newgrounds audio notice


